What are Projects?
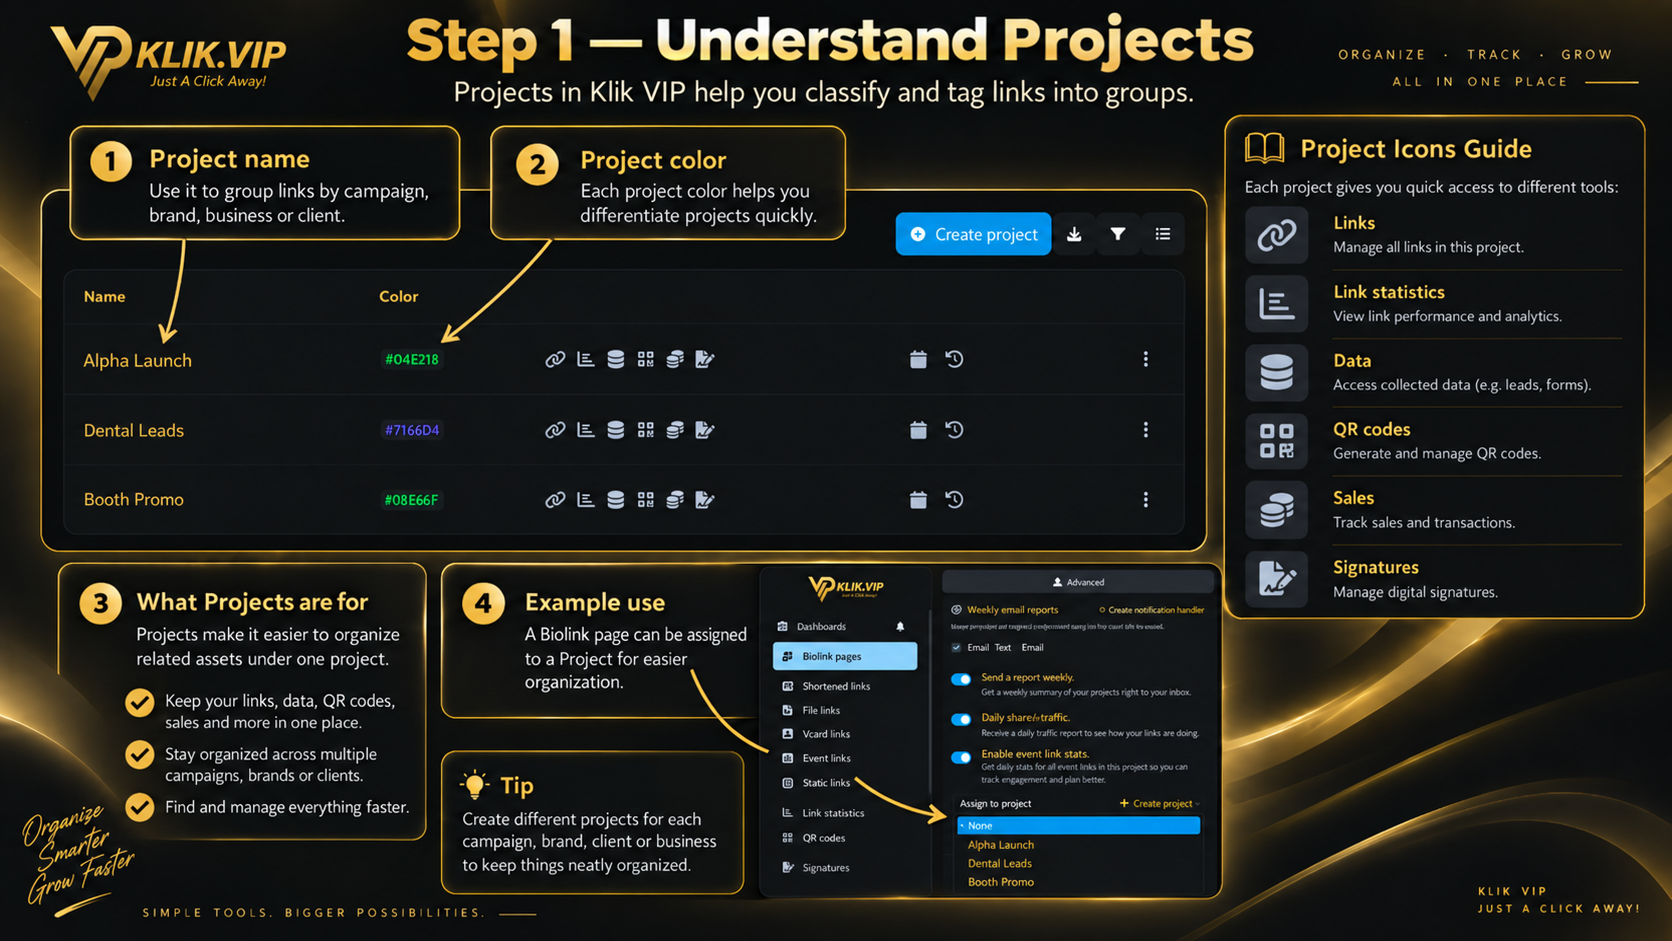
Projects are a simple organization feature inside Klik VIP. They let you group related items under one label so your account is easier to manage.
Instead of mixing everything together, you can create separate projects for different brands, campaigns, offers, teams, events or clients.
Classify your work
Use Projects like tags or folders so your links and related items are grouped properly.
Use color for fast recognition
Each project has a color, so you can identify it faster when you have many active projects.
Keep campaigns separate
For example, you can separate a Ramadan campaign, webinar registration links and evergreen company assets.
Manage related items together
A project can connect to links, statistics, data, QR codes, sales and signatures through the icons shown on the Projects page.
Why use Projects?
Projects are useful when your Klik VIP account starts to grow. They make it easier to know which asset belongs to which campaign or business objective.
Step 1: Open Projects
Open Projects from the Klik VIP dashboard to see all your project groups in one place. The project list shows each project name, its color, quick-access icons and the Create project button.
Step 2: Create or edit a project
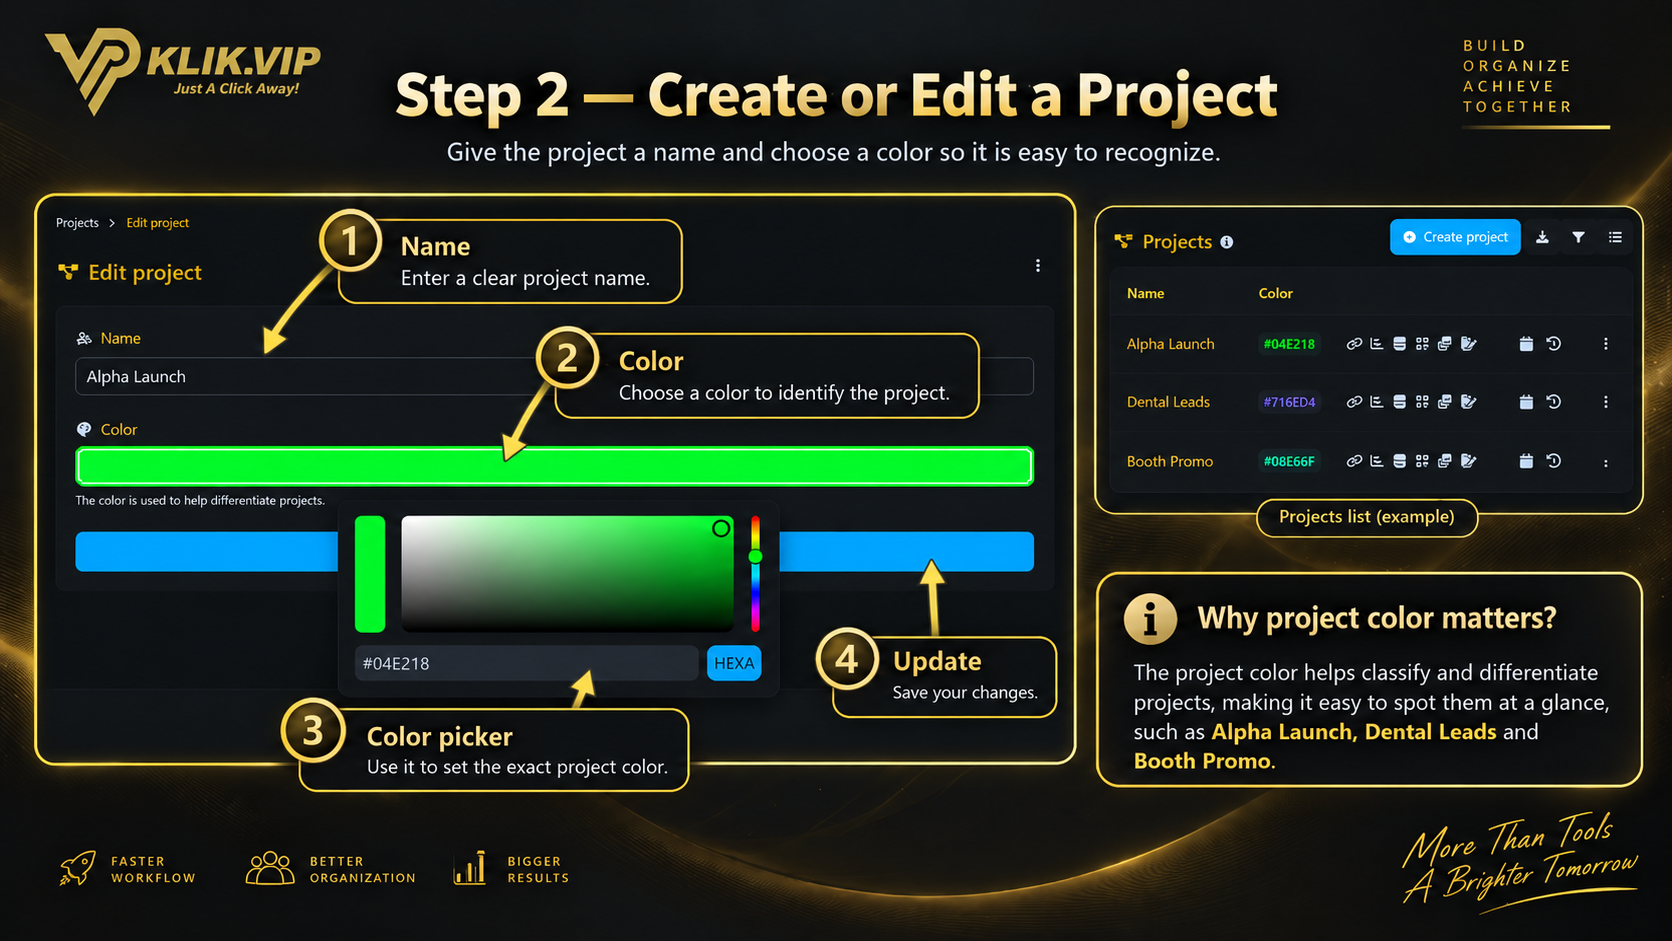
When you create or edit a project, the two main fields are:
Project name
Choose a clear, meaningful name so you immediately know what the project is for.
Project color
Pick a color to help differentiate the project visually. This is especially useful when you manage several projects at once.
After making changes, click Create or Update to save them.
Step 3: Understand the project icons
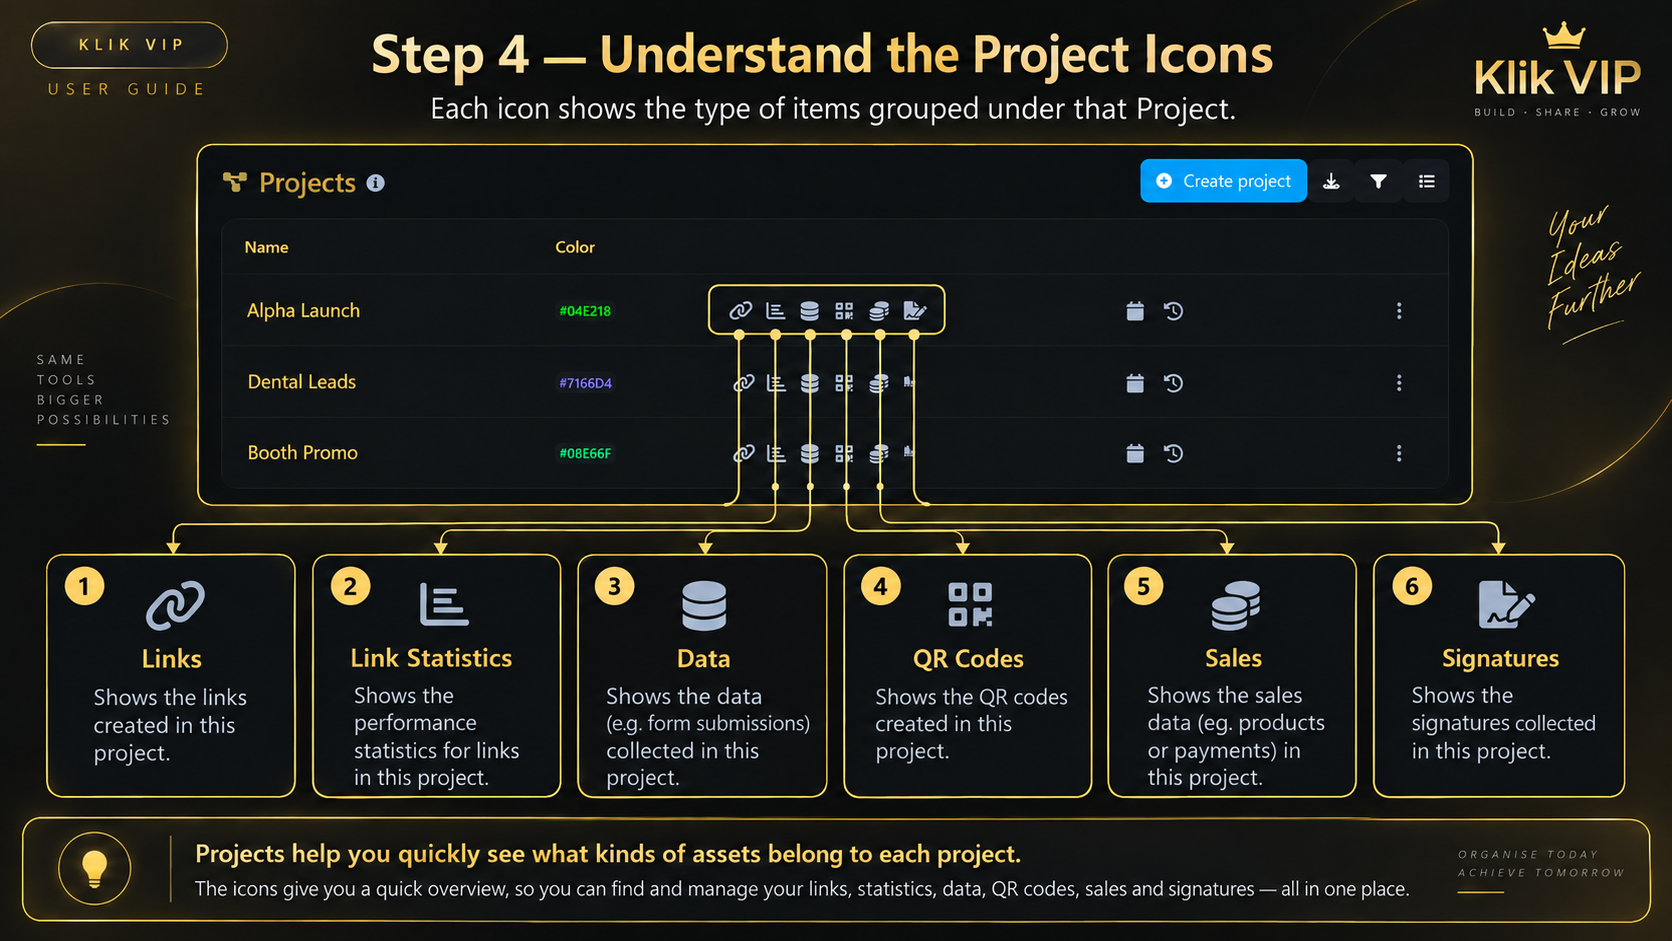
Each project row includes icons that help you jump quickly to related items connected to that project.
- Links — open links connected to the project.
- Links statistics — view performance or analytics related to the project.
- Data — open project-related data.
- QR codes — open QR codes under that project.
- Sales — open sales-related items linked to the project.
- Signatures — open signatures connected to that project.
Step 4: Assign a biolink or other asset to a project
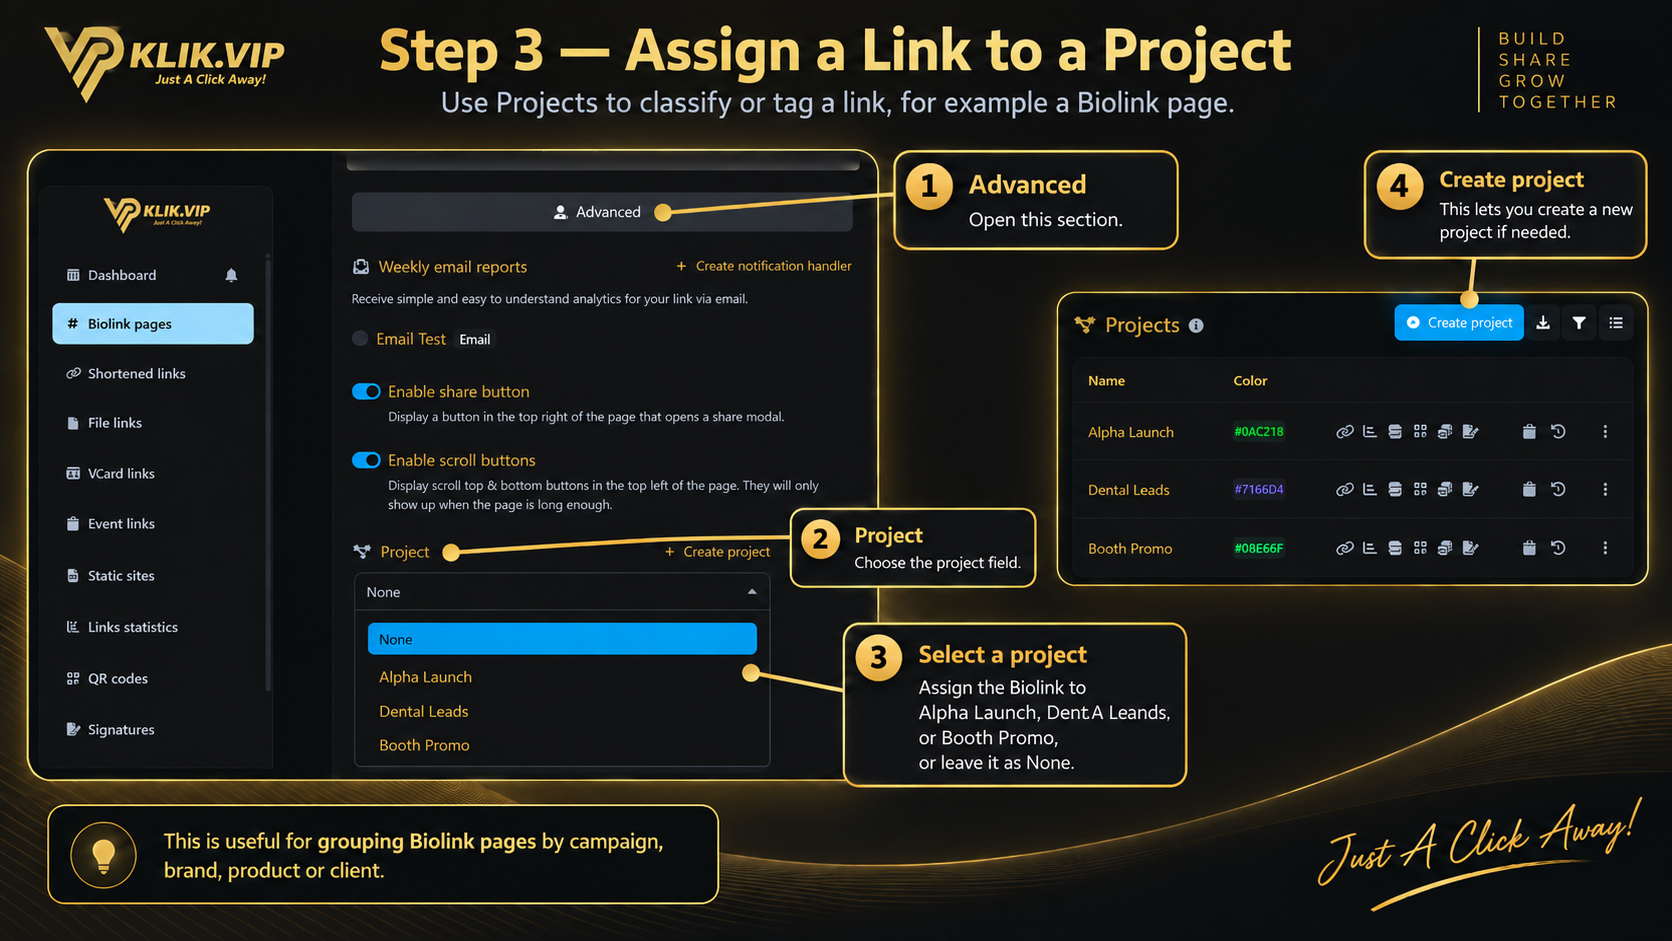
After creating a project, you can tag supported assets to that project. One easy example is a biolink page.
Open the item you want to organize, go to its settings, then find the Project field in the relevant section and choose the project name from the dropdown list.
Tips & examples
Best practices
- Create projects based on how you actually work: campaign, brand, event, team or client.
- Use distinct colors so projects are easy to identify at a glance.
- Assign assets to a project as you create them, instead of leaving organization for later.
- Review project names occasionally and rename them if the business purpose changes.
Suggested project ideas
- Booth Leads — for event biolinks, QR codes and follow-up assets.
- Product Launch — for launch pages, registration links and campaign tracking.
- Customer Support — for support links, contact pages and help assets.
- Affiliate Drive — for recruitment links, landing pages and promotional assets.