What is a Custom Domain?
A Custom Domain lets you use your own domain or subdomain with Klik VIP instead of relying only on the default Klik VIP domains available in the platform.
Your own domain
Connect a domain or subdomain that you control.
DNS connection required
Klik VIP requires the domain or subdomain to point to the platform before you submit the connection form.
Optional index redirect
You can enter a Custom index URL if you want visitors landing on the domain index to be redirected to a specific URL.
Optional 404 redirect
You can enter a Custom 404 not found URL for visitors who reach a page that does not exist on the domain.
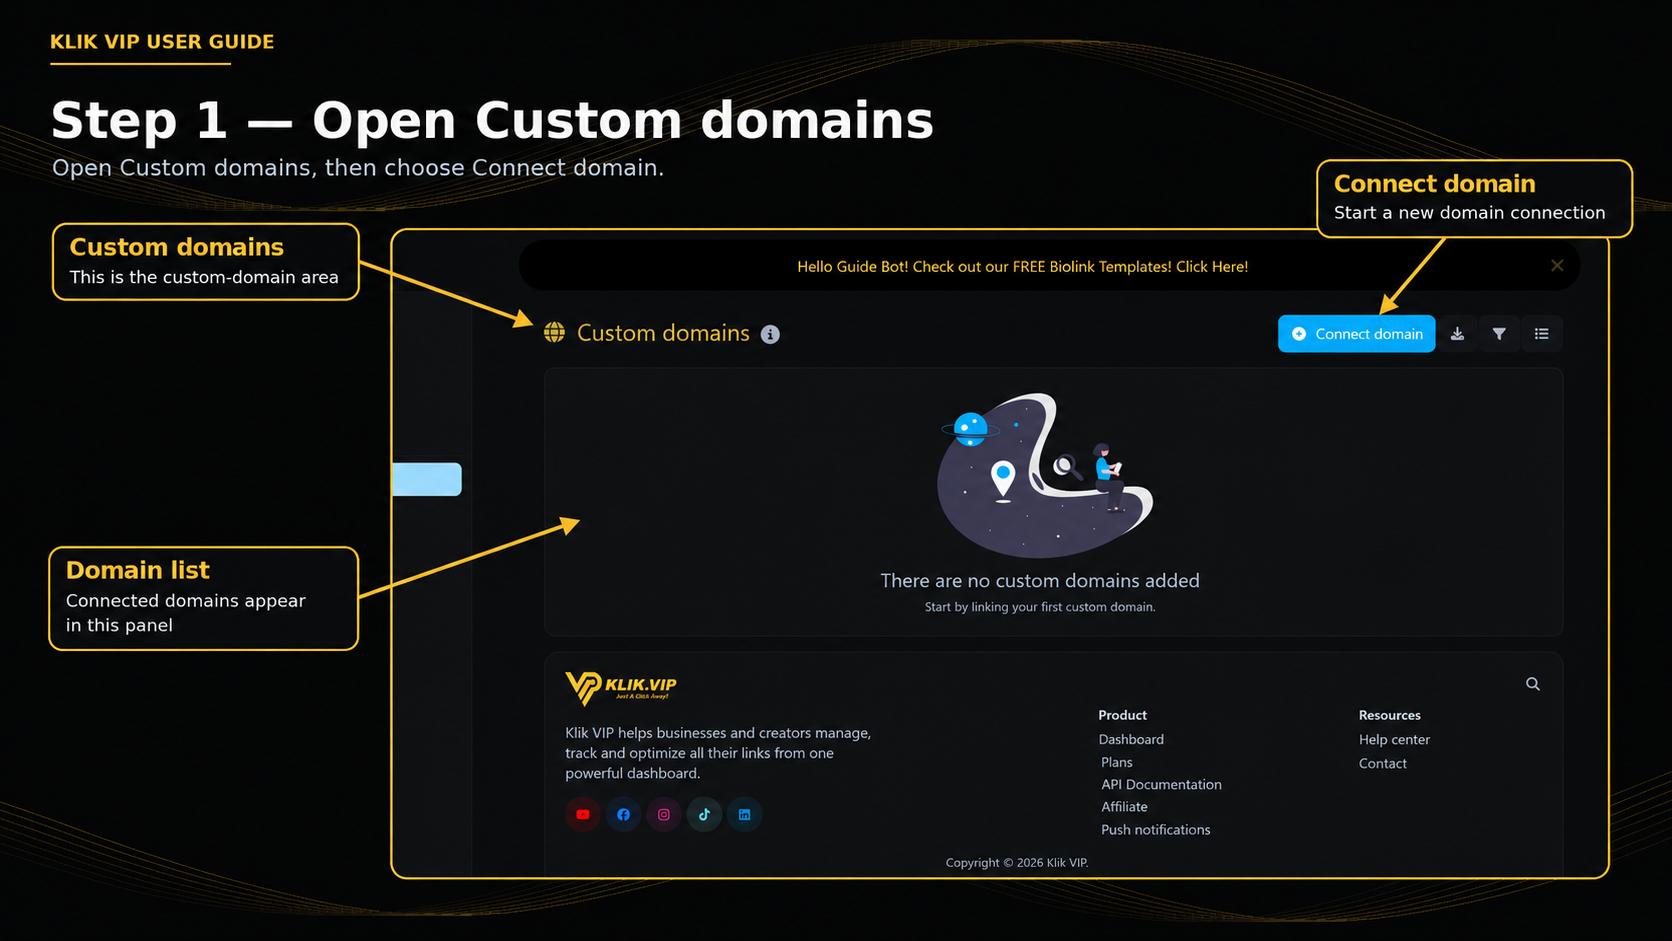
1. Open Custom domains
Open Custom domains from Klik VIP. Your connected domains appear on this page. Click Connect domain to start a new custom-domain connection.
2. Point your DNS to Klik VIP
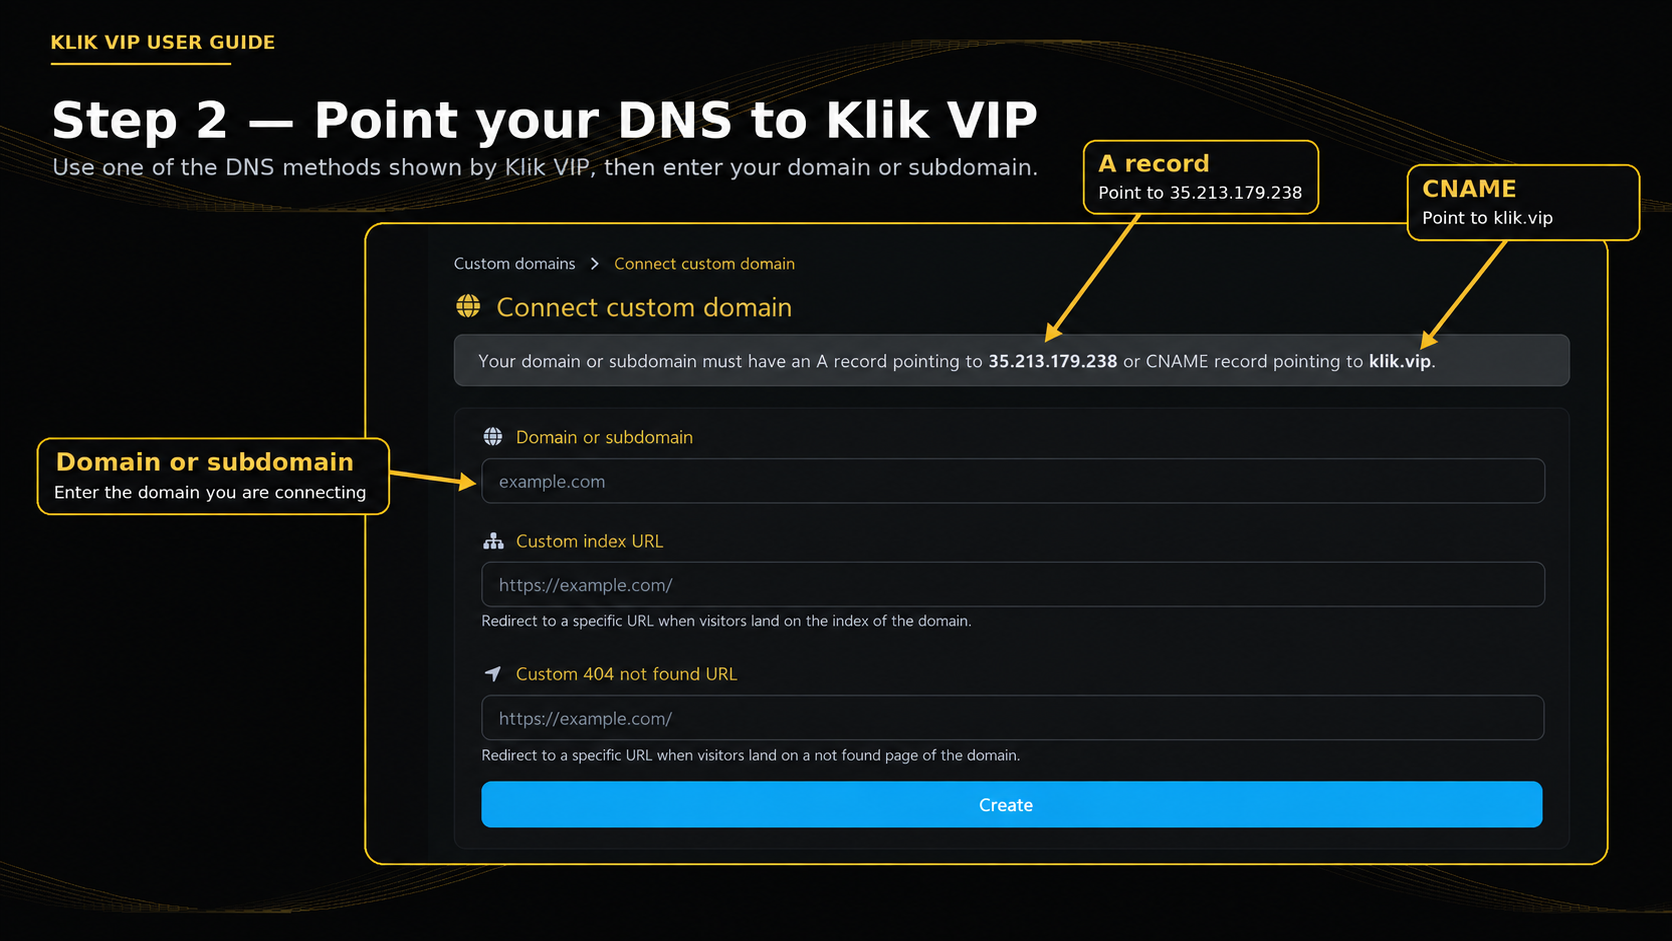
The connection page shows the DNS requirement directly above the form. Your domain or subdomain must use one of the supported DNS methods shown by Klik VIP:
A record
Point the A record to 35.213.179.238.
CNAME record
Point the CNAME record to klik.vip.
3. Enter the domain or subdomain
Enter the domain or subdomain in the Domain or subdomain field. The field is required.
4. Optional redirect URLs and Create
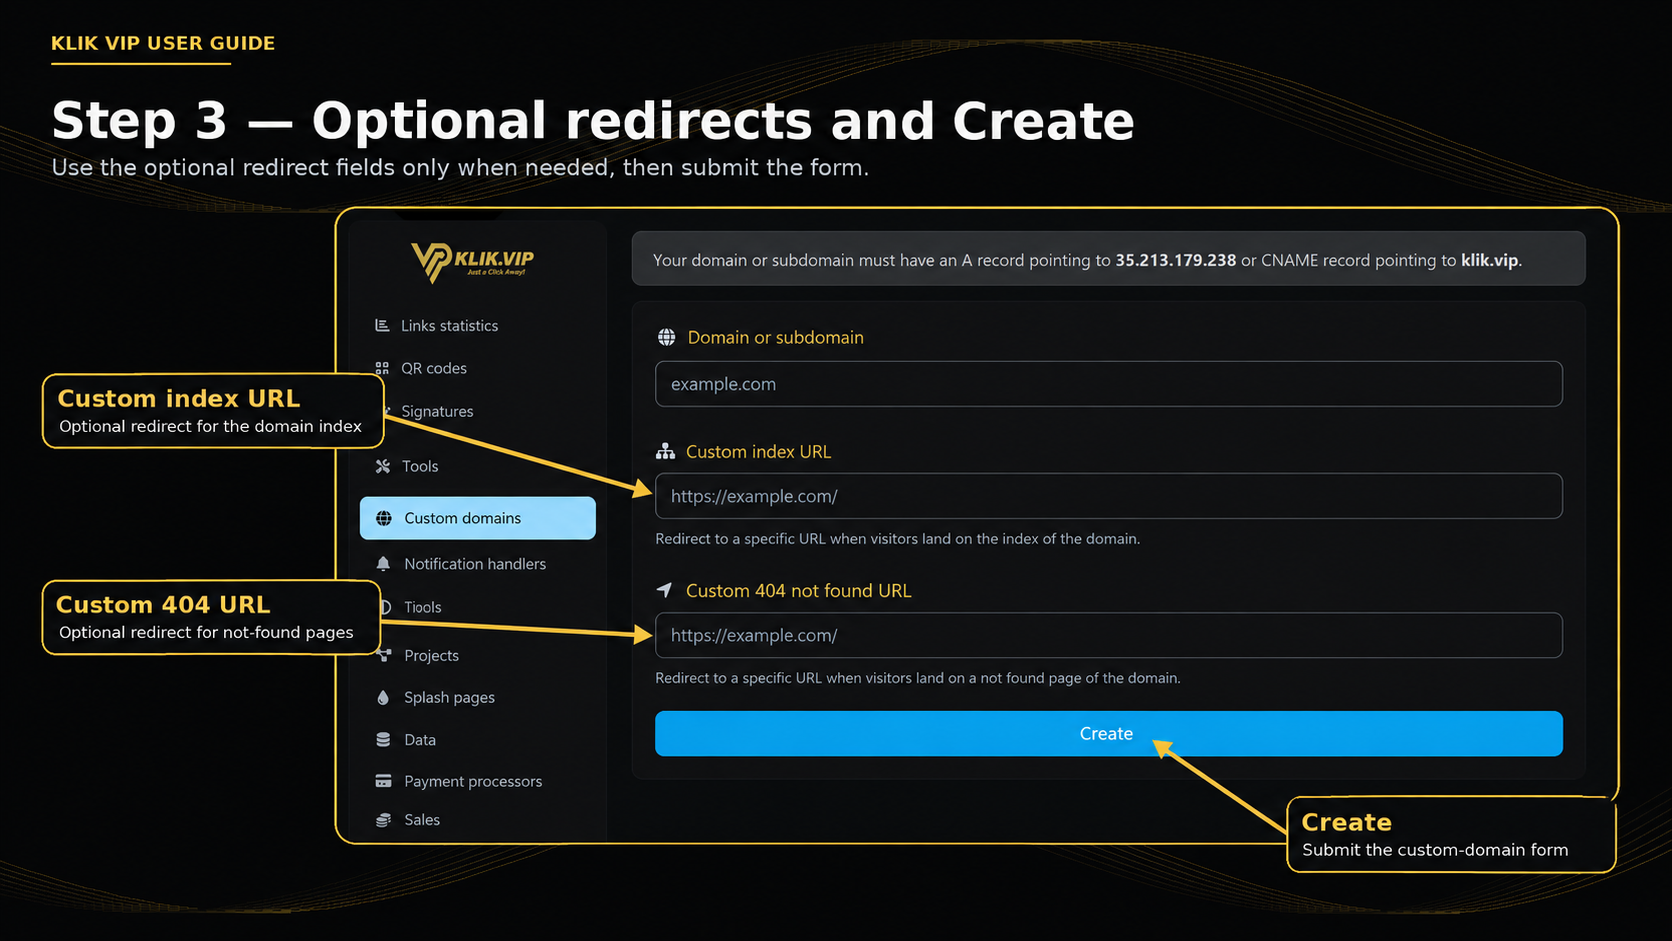
The same form includes two optional redirect fields:
Custom index URL
Redirect visitors to a specific URL when they land on the index of the domain.
Custom 404 not found URL
Redirect visitors to a specific URL when they land on a not-found page of the domain.
5. Tips & troubleshooting
Tips
- Configure the DNS record before submitting the custom-domain form.
- Double-check the domain or subdomain spelling before selecting Create.
- Use Custom index URL and Custom 404 not found URL only when you need those redirects.
Troubleshooting
- The domain cannot be connected yet: re-check that the DNS record matches one of the values shown by Klik VIP.
- You changed the DNS recently: DNS changes can take time to become visible, depending on the DNS provider and record settings.
- You are unsure whether to use A or CNAME: follow the DNS method appropriate for the host/name you are connecting and the controls available at your DNS provider.