What is the Klik VIP API?
The Klik VIP API allows external applications, scripts and automation tools to work with supported Klik VIP resources programmatically.
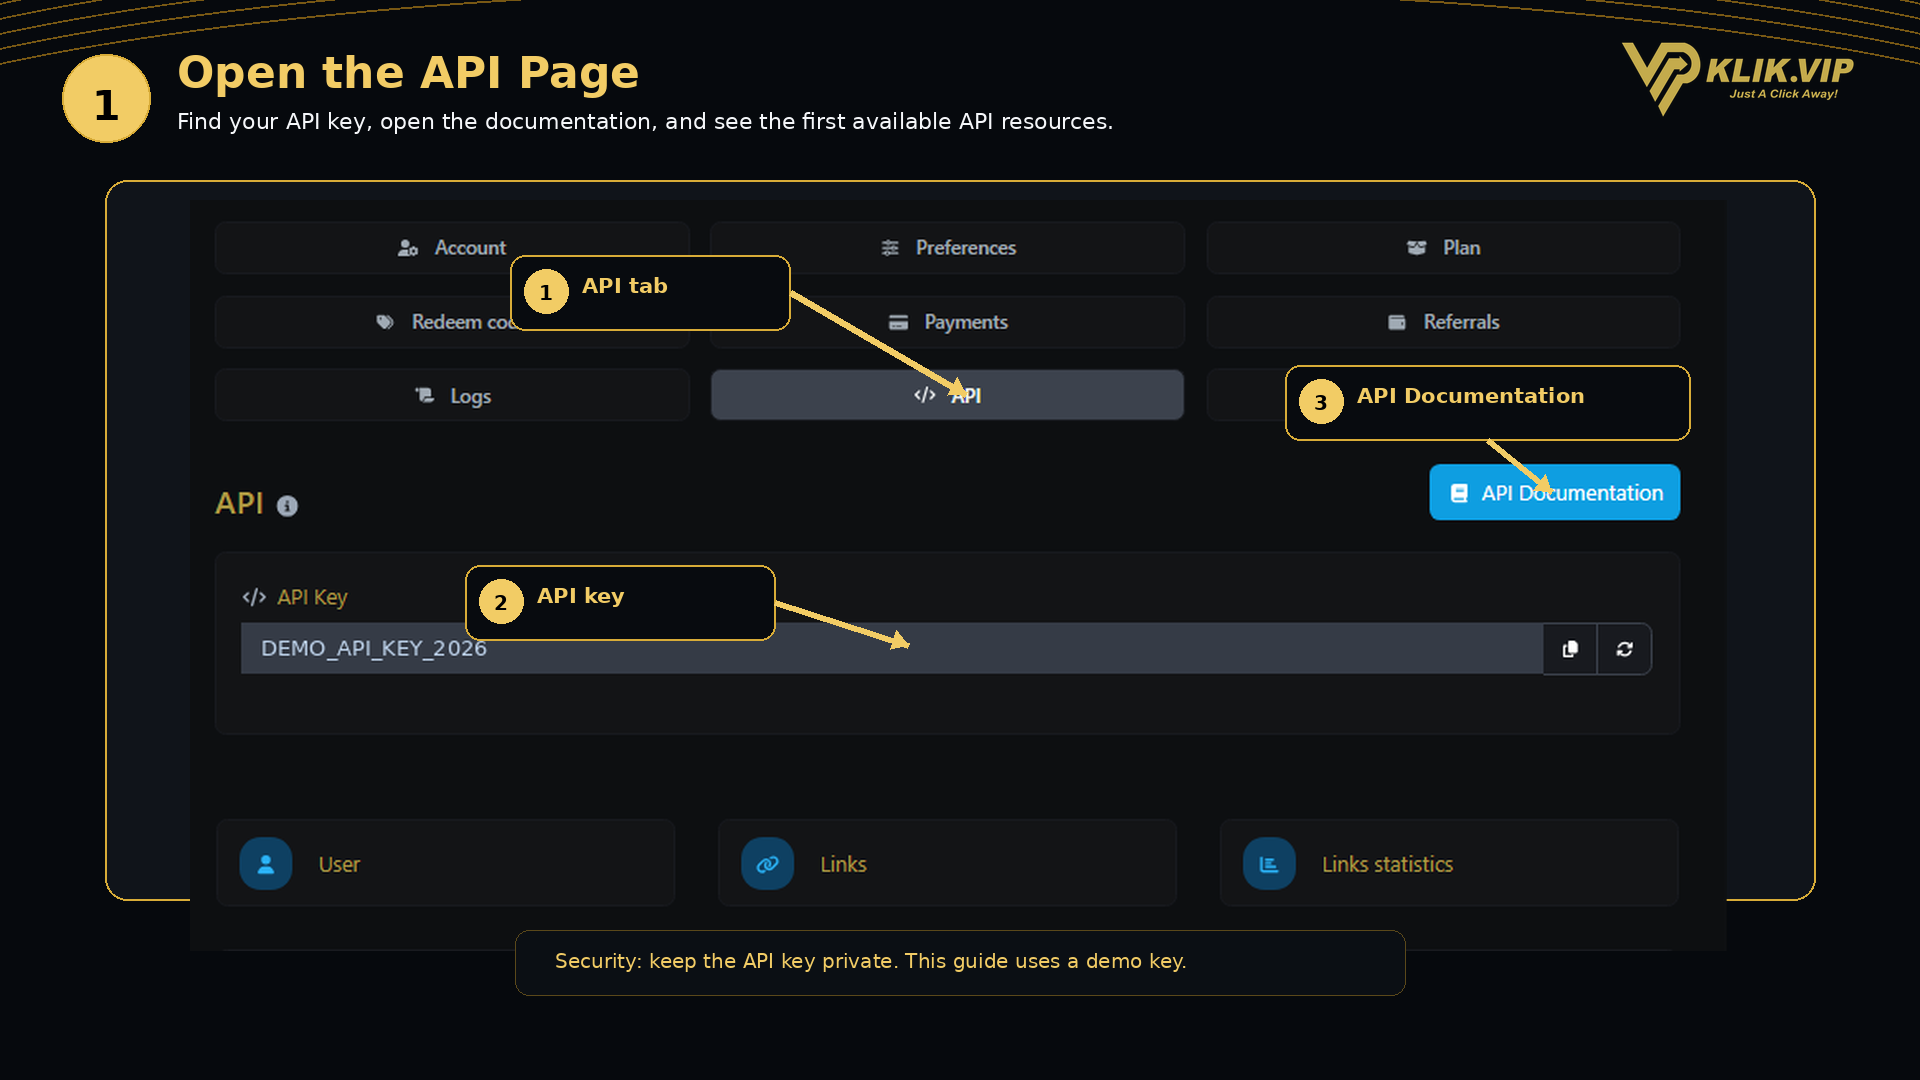
Your API page provides:
- Your account's API Key.
- A copy control for the key.
- A regenerate control for replacing the key.
- A direct link to the API Documentation.
- A list of available API resource groups.
1. Find and Protect Your API Key
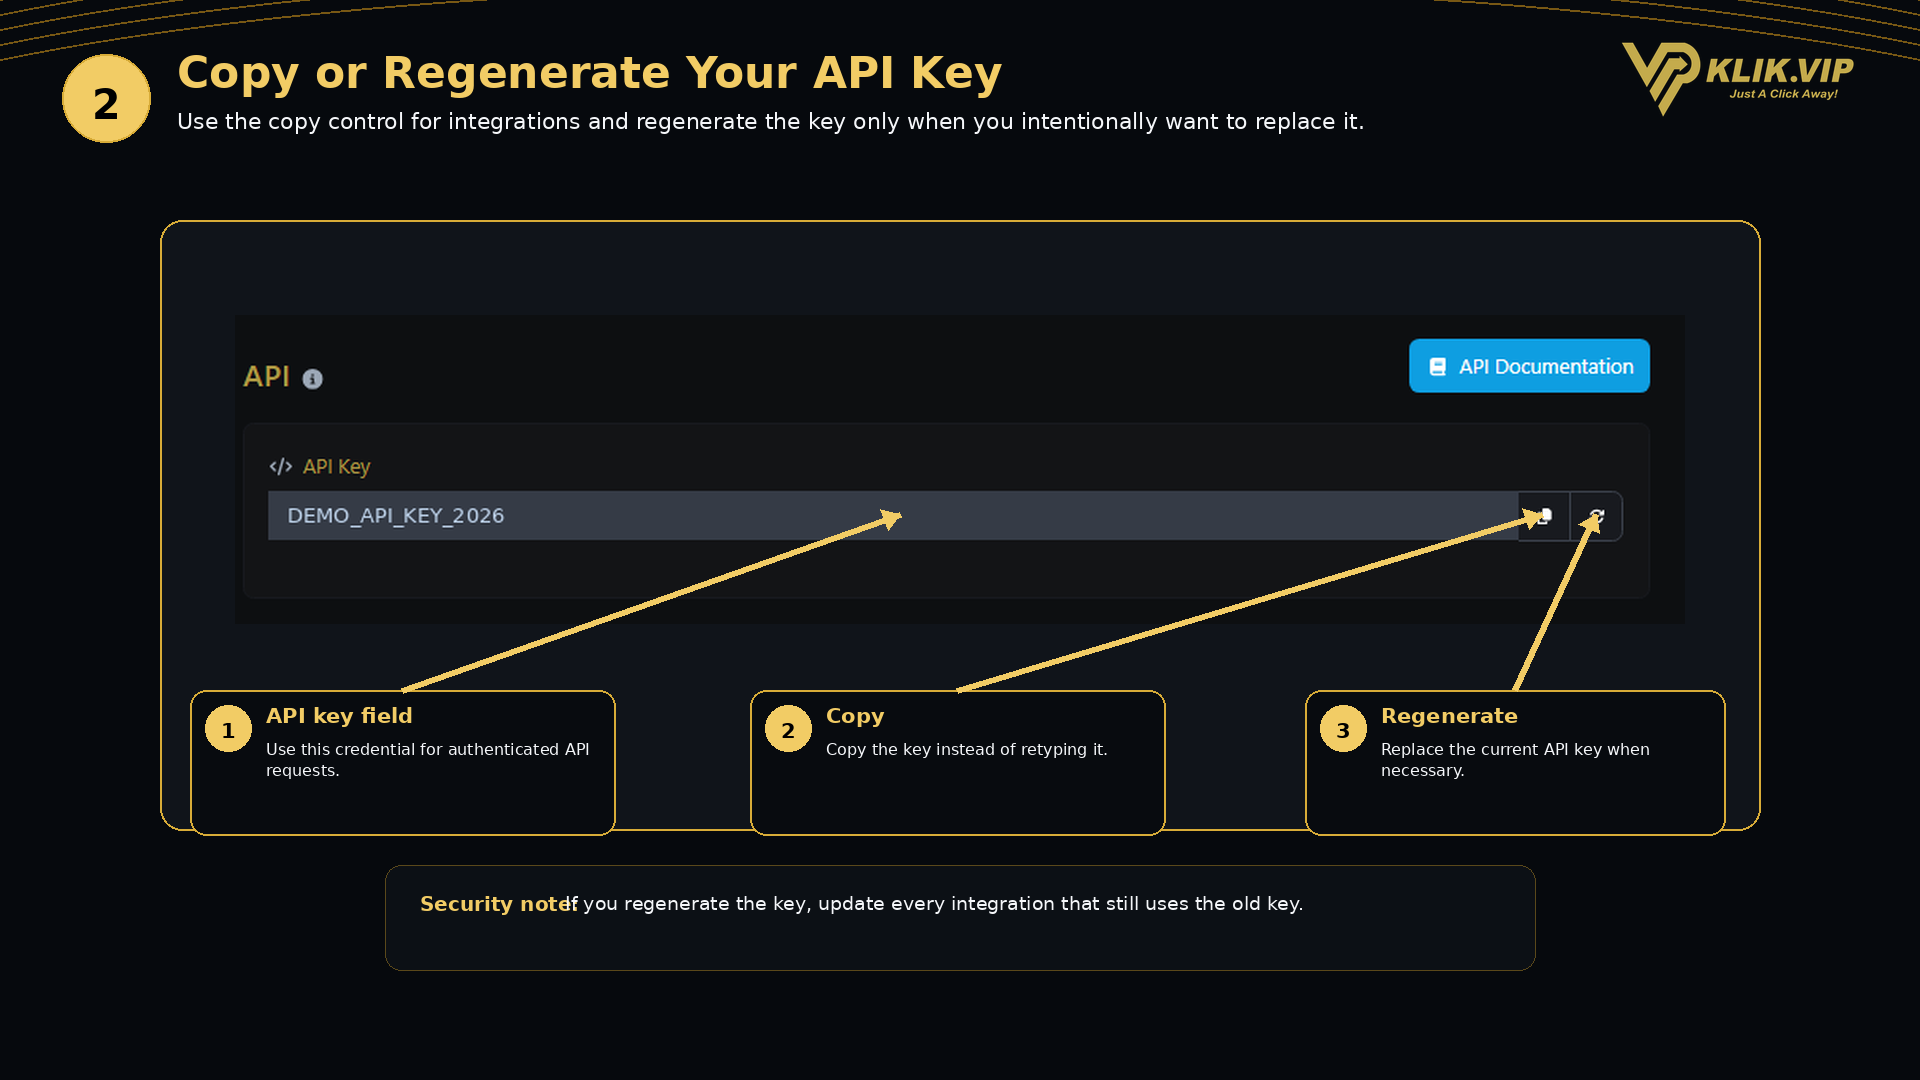
Your API Key is the credential used to authenticate requests made to the Klik VIP API.
- Use the copy button instead of manually retyping the key.
- Use the regenerate button when you intentionally want to replace the current key.
- Do not publish the key in screenshots, public repositories, client-side JavaScript or shared documents.
2. Authenticate API Requests
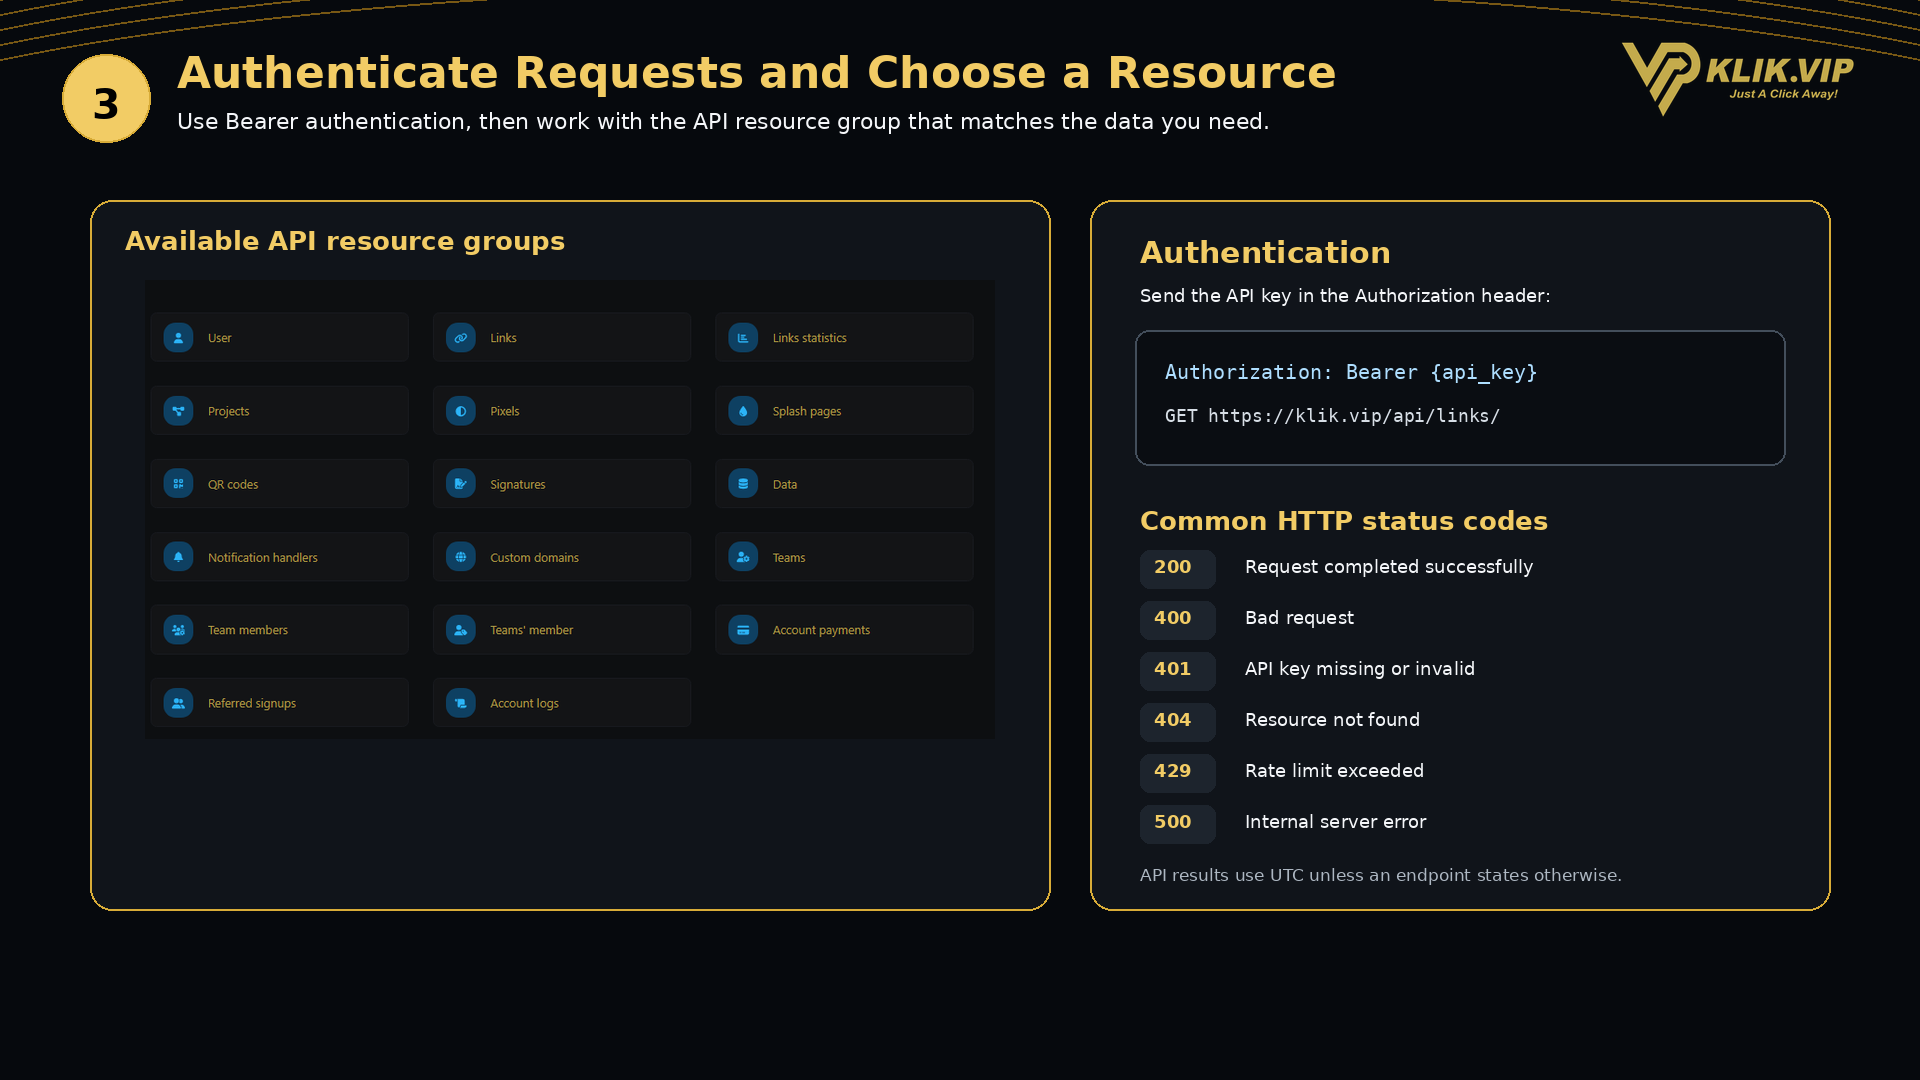
The official Klik VIP API Documentation states that API requests require authentication through an API key sent in the Authorization header using Bearer authentication.
Authorization: Bearer {api_key}A basic request follows this pattern:
curl --request GET \
--url 'https://klik.vip/api/{endpoint}' \
--header 'Authorization: Bearer {api_key}'GET https://klik.vip/api/links/ to retrieve links.3. Choose an API Resource
The API page shows resource groups that can be used for supported API operations. The visible groups include:
Links & analytics
User, Links and Links statistics.
Organization
Projects, Teams, Team members and Teams' member.
Marketing & tracking
Pixels, Splash pages, QR codes and Notification handlers.
Assets & account data
Signatures, Data, Custom domains, Account payments, Referred signups and Account logs.
4. Use the API Documentation
Open the official documentation from the API Documentation button on your API page:
Open Klik VIP API Documentation
The documentation explains the base request structure, authentication, endpoint-specific parameters, examples and response formats.
For example, the Links documentation includes operations for:
- Retrieving all links.
- Retrieving one link.
- Creating a link.
- Updating a link.
- Deleting a link.
Common HTTP Status Codes
Klik VIP uses conventional HTTP status codes to indicate whether an API request succeeded or failed.
- 200 — request completed successfully.
- 400 — bad request; required parameters may be missing or invalid.
- 401 — unauthorized; the API key may be missing or invalid.
- 404 — the requested resource was not found.
- 429 — too many requests; the rate limit was exceeded.
- 500 — internal server error.
5. Security & Integration Tips
- Keep your API key on the server side or inside a secure secrets/environment-variable system.
- Do not paste the key into public code, screenshots or repositories.
- Use the copy button to avoid accidental typing errors.
- Regenerate the key if you believe the existing credential has been exposed.
- After regenerating a key, update every integration that depends on the old key.
- Read the documentation for the exact endpoint before sending create, update or delete requests.
- Handle 401, 429 and server errors gracefully in automated workflows.