What is the Teams System?
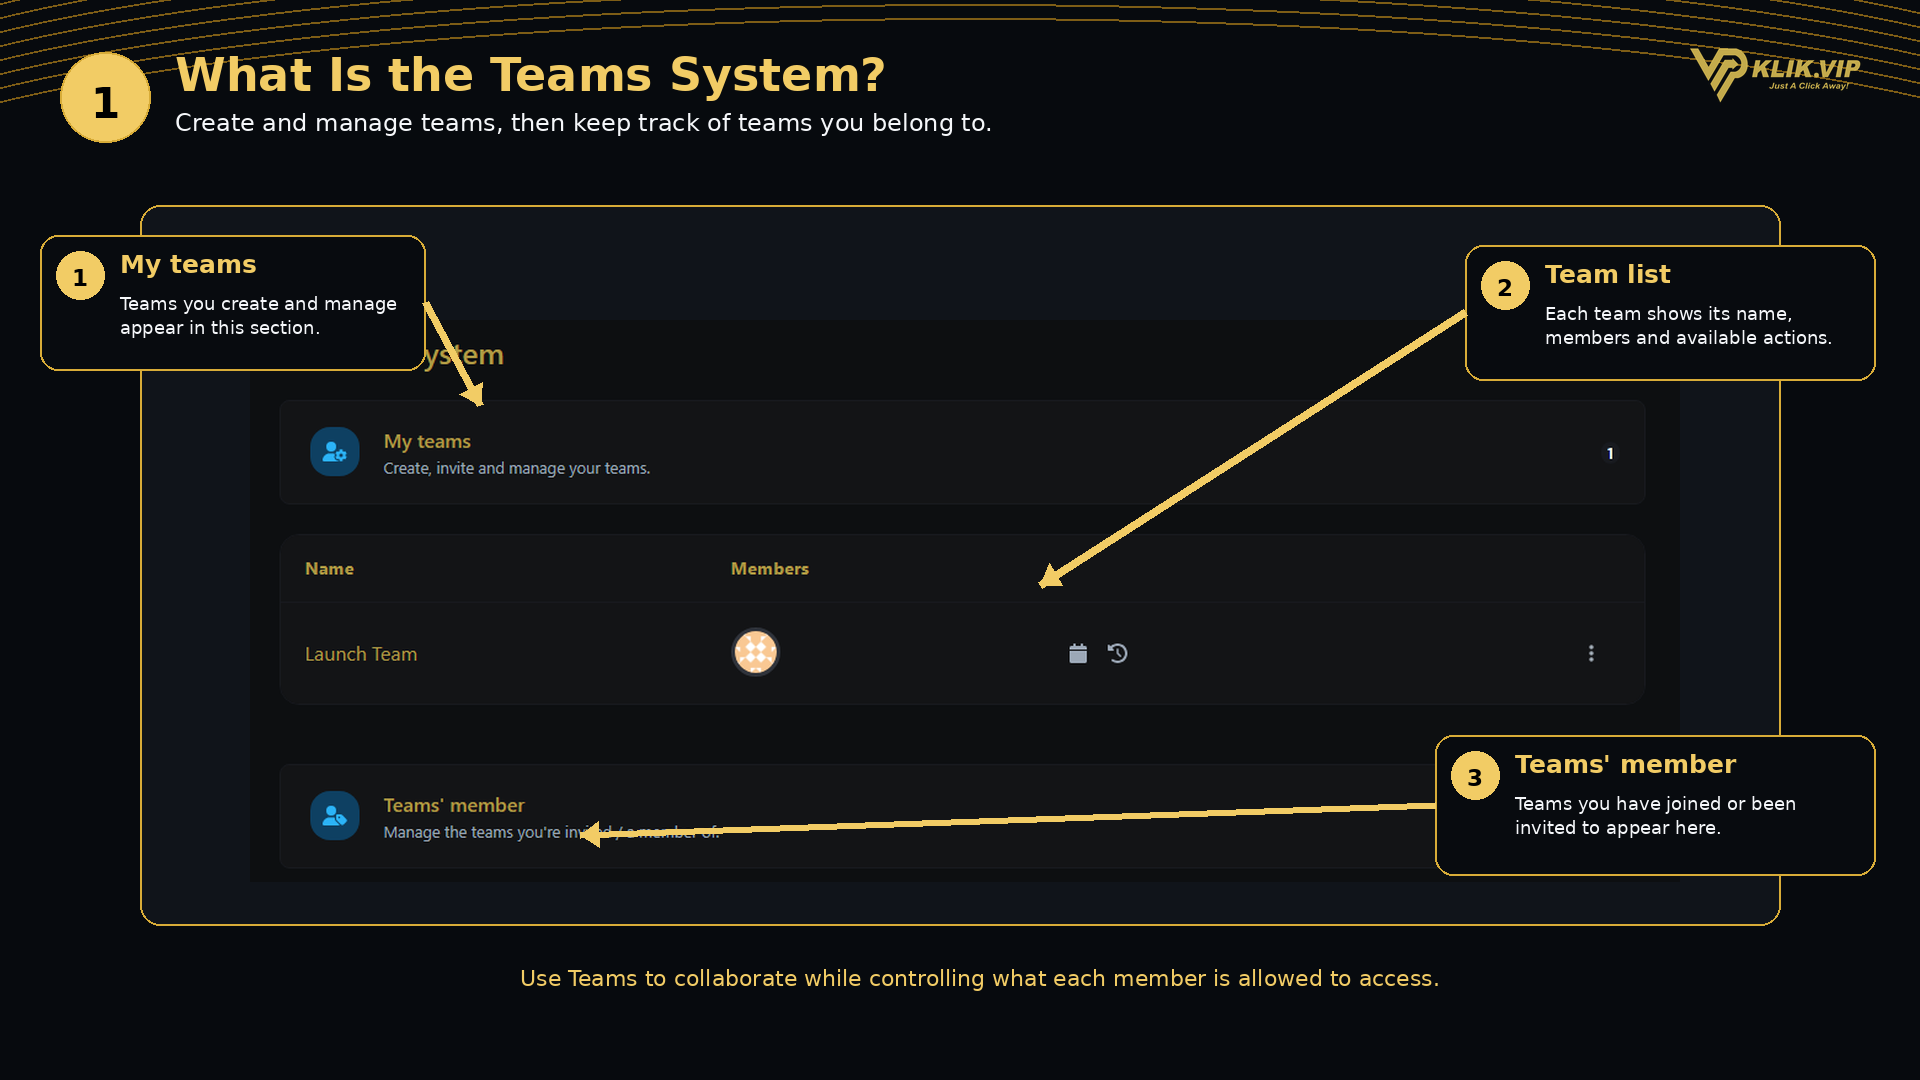
The Teams system allows you to collaborate with other users without giving everyone unrestricted access to your Klik VIP account.
My teams
Teams you create, invite people to and manage yourself.
Teams' member
Teams you have been invited to or are already a member of.
1. Open a Team and Review Members
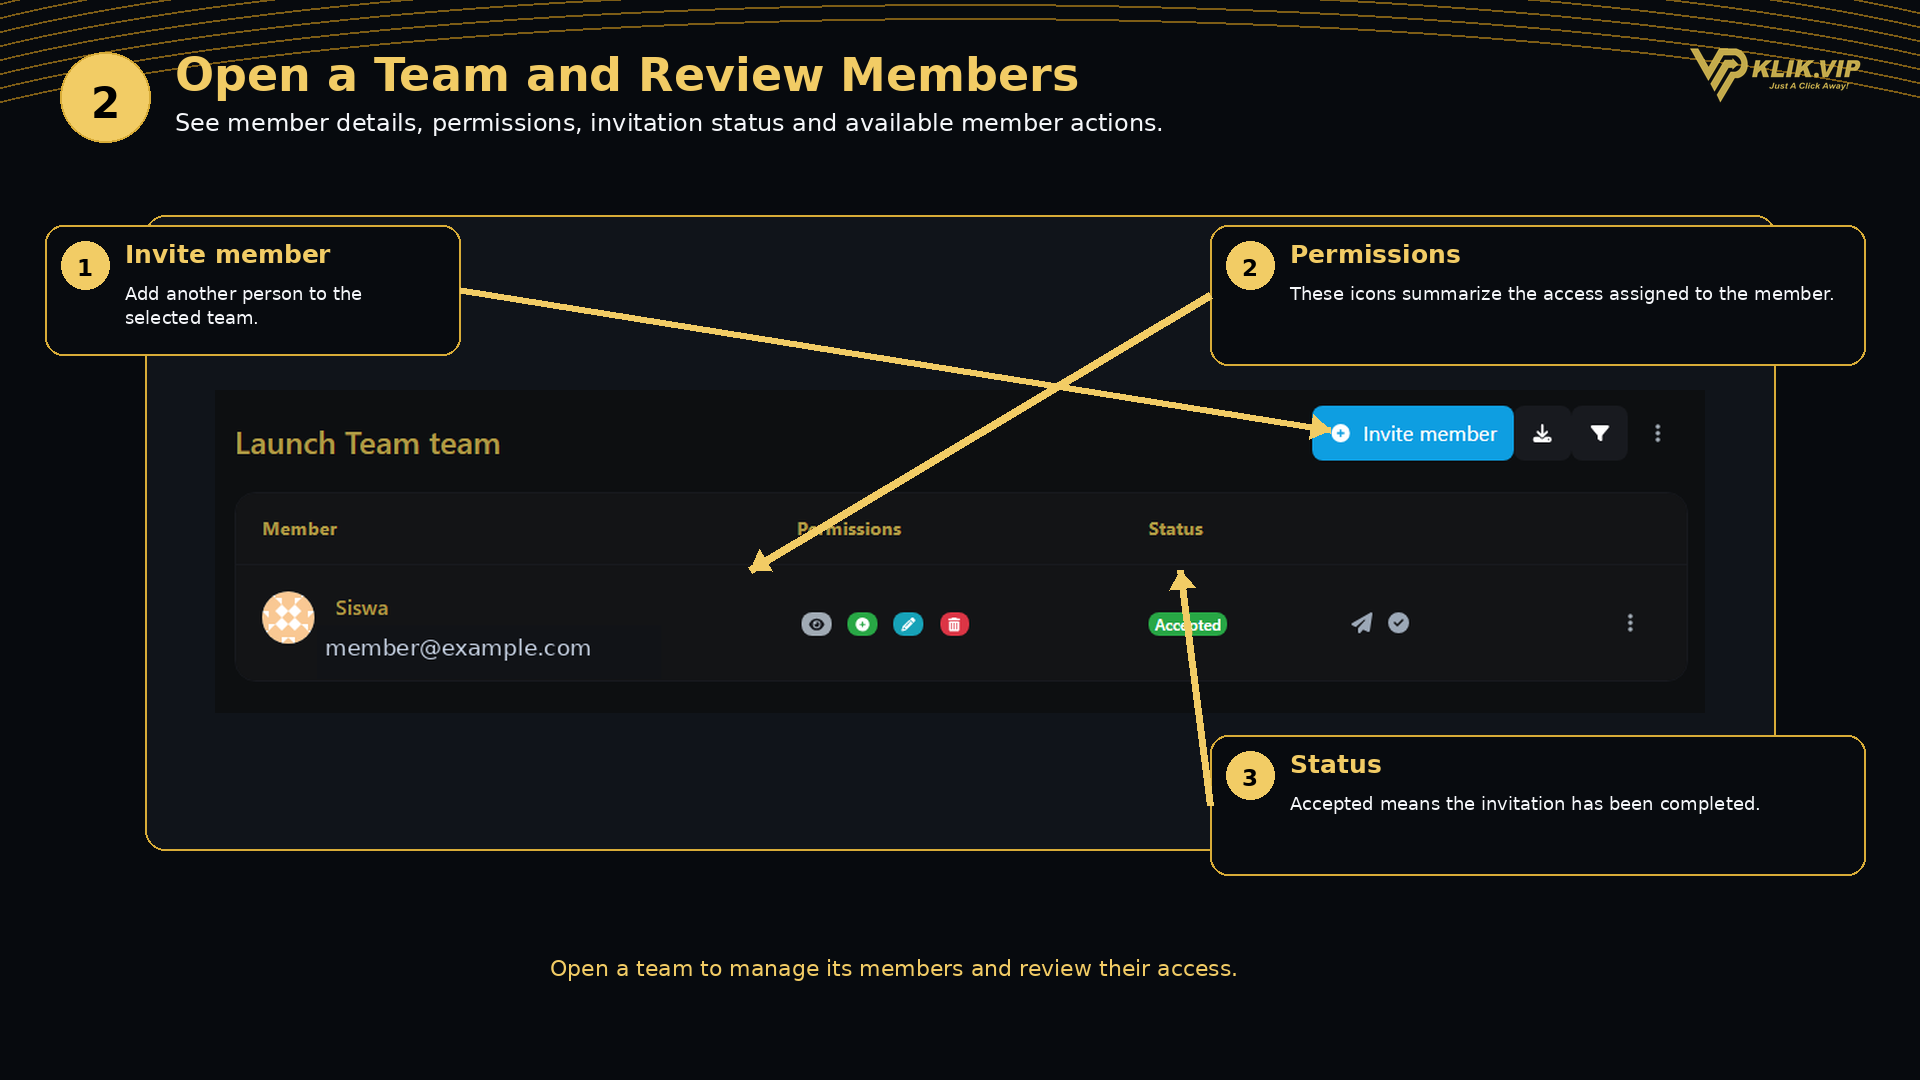
Open a team to see the people who currently have access. Each row shows the member, their permission indicators, invitation status and available member actions.
- Member — shows the member name and email address.
- Permissions — summarizes the access currently assigned.
- Status — shows whether the invitation has been accepted.
- Invite member — use this button to add another person to the team.
2. Invite a Team Member
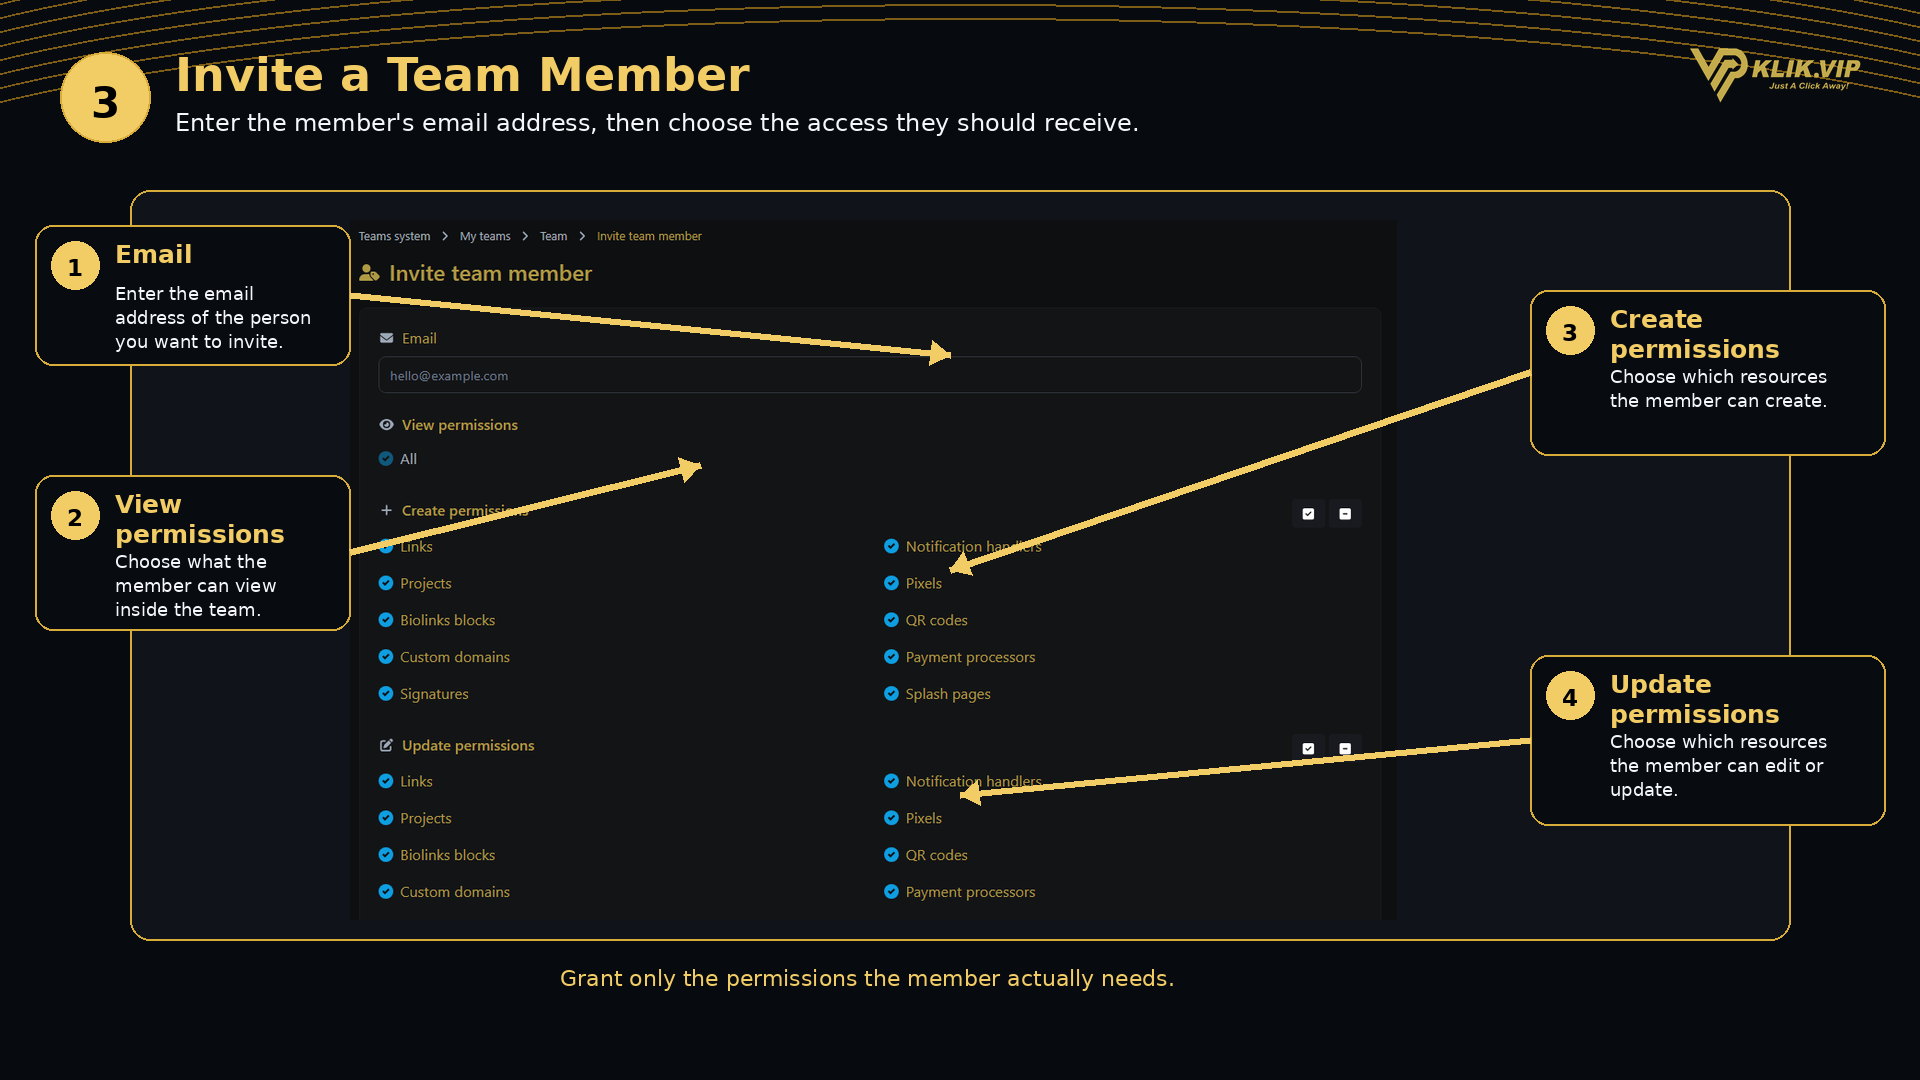
Click Invite member, enter the person's email address, then choose the permissions you want to grant.
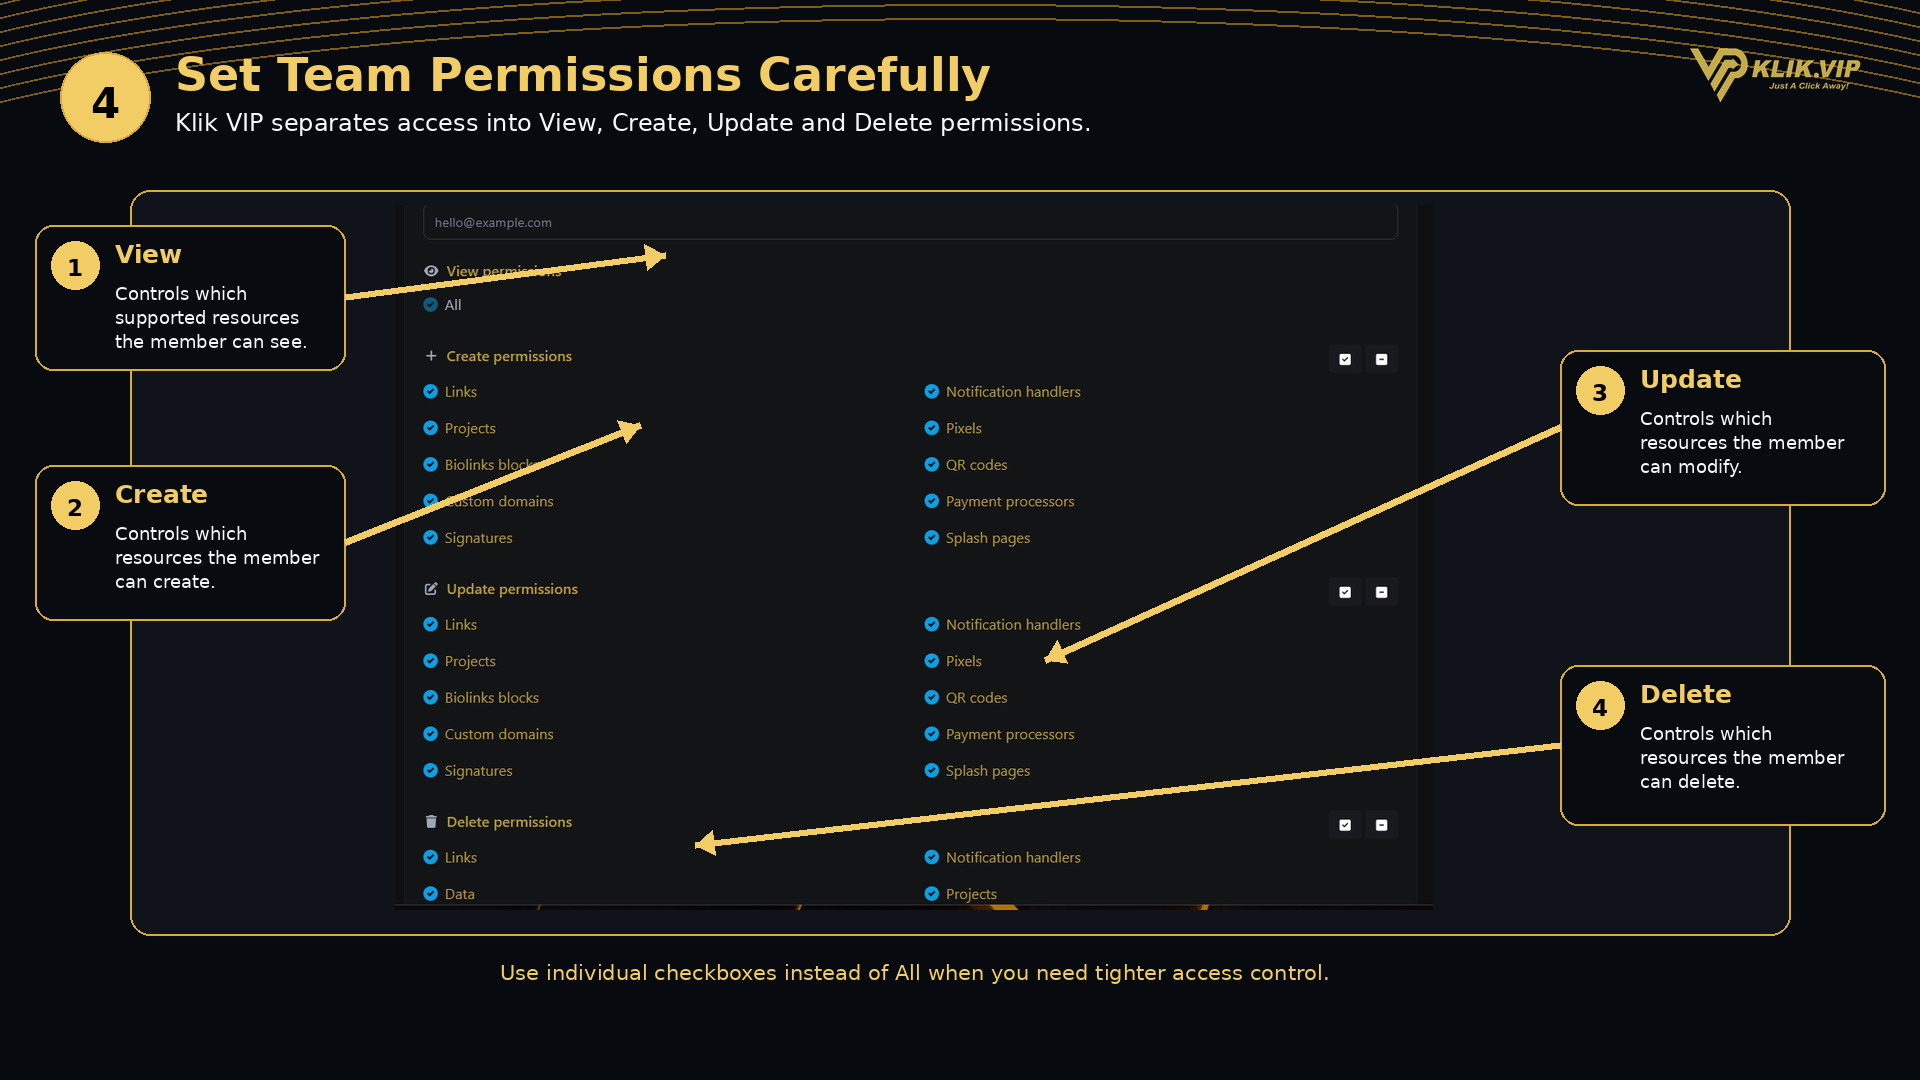
View permissions
Controls which supported resources the member can see.
Create permissions
Controls which supported resources the member can create.
Update permissions
Controls which supported resources the member can modify.
Delete permissions
Controls which supported resources the member can remove.
3. Set Permissions Carefully
The permissions screen lets you control access by both action and resource. A member can be allowed to view a feature without automatically receiving permission to create, update or delete it.
- Links
- Projects
- Biolinks blocks
- Custom domains
- Signatures
- Notification handlers
- Pixels
- QR codes
- Payment processors
- Splash pages
- Data and other available resources where shown
4. Tips & Access Control
- Grant the minimum access required. A member who only needs to review links may not need Create, Update or Delete permissions.
- Be especially careful with Delete permissions. Only enable them for people who genuinely need to remove resources.
- Review member access periodically. Reduce or remove access when a person's role changes.
- Use clear team names so you can identify the purpose of each team easily.
- Check invitation status when a member says they cannot access the team.