What are Payment Processors?
A Payment Processor is the gateway Klik VIP uses to process payments from a Product block. You first connect the processor under Payment processors, then choose the connected processor inside the Product block that should use it.
Connect once
Save the gateway connection in Klik VIP so it becomes available to supported payment-enabled blocks.
Choose per product
Select the processor you want a specific Product block to use.
Gateway-specific fields
The credentials shown depend on the processor selected.
Checkout flow
The connected gateway handles the payment step for the Product block.
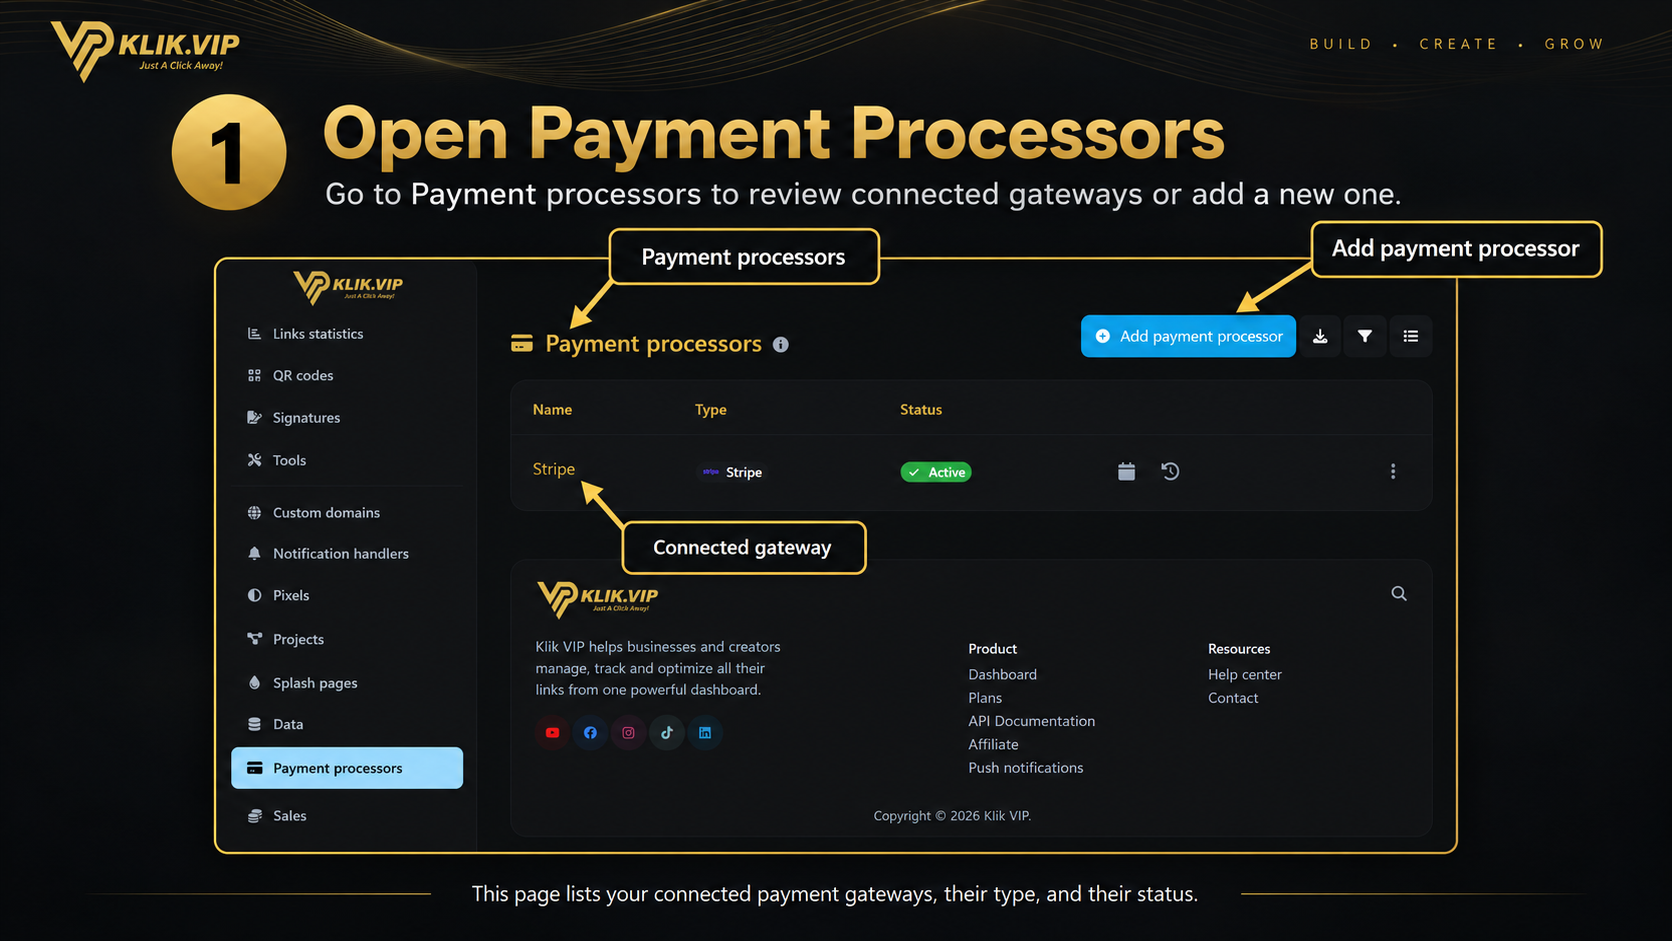
1. Open Payment Processors
Open Payment processors from the Klik VIP dashboard. This page shows your connected gateways, their type and current status.
- Open Payment processors from the left menu.
- Review any gateway that is already connected.
- Click Add payment processor to create a new connection.
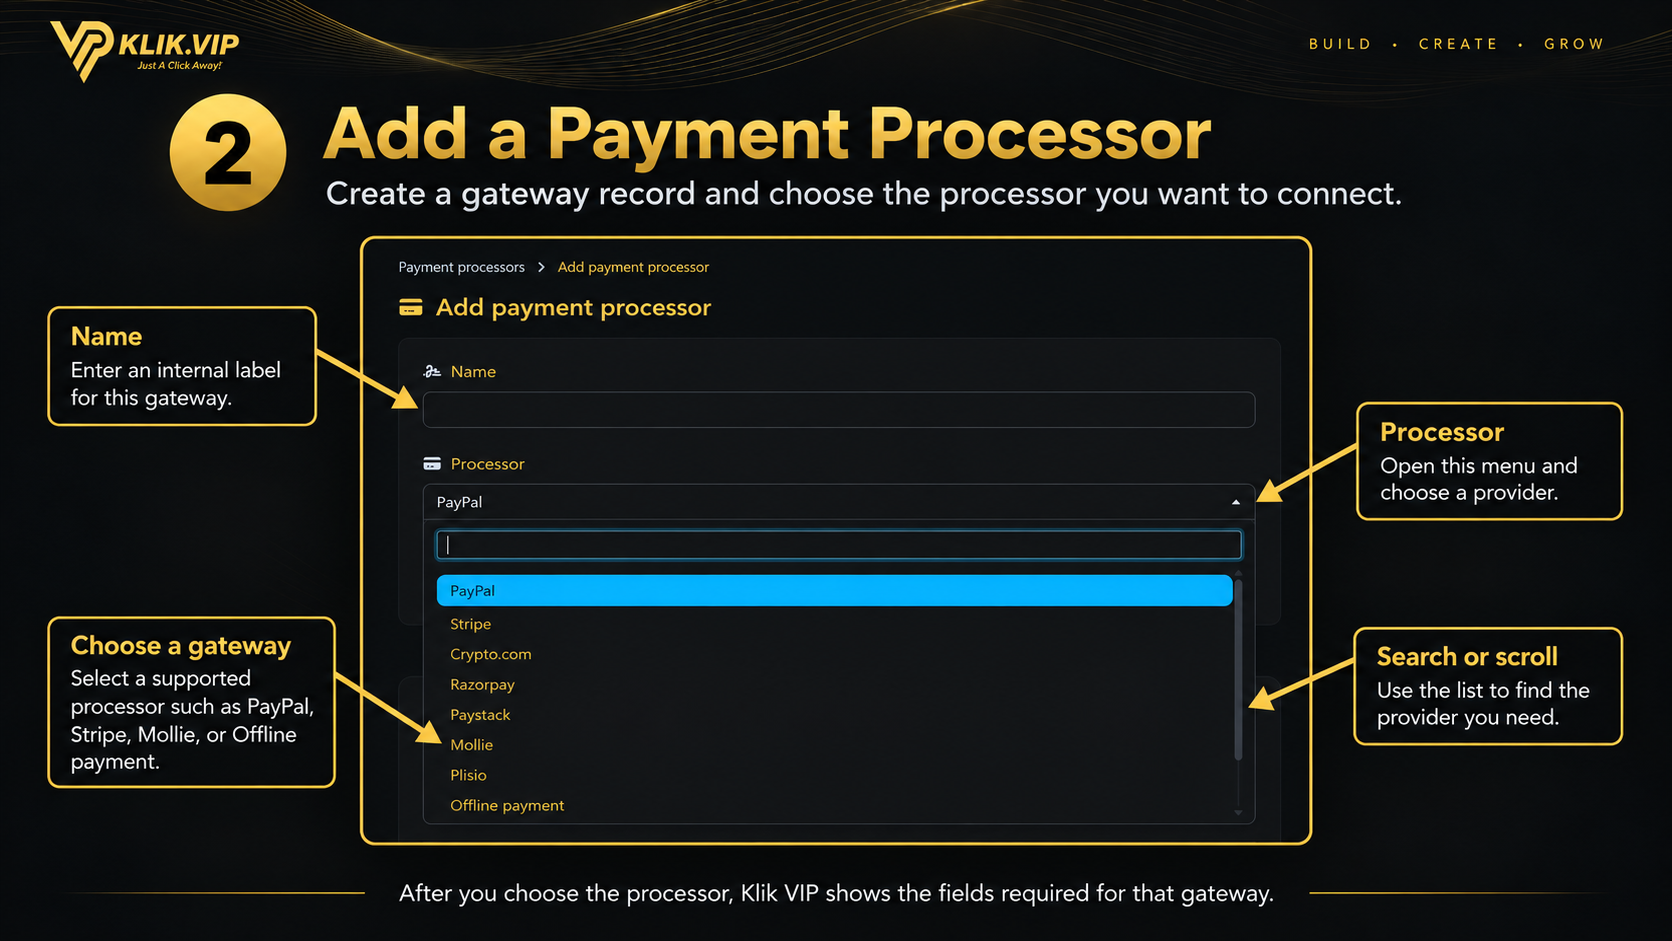
2. Add a Payment Processor
Click Add payment processor, give the connection a clear internal name, then choose the processor you want to connect.
- Name — an internal label for the gateway connection.
- Processor — select the provider you want to use.
- Use the processor list to find the gateway you need.
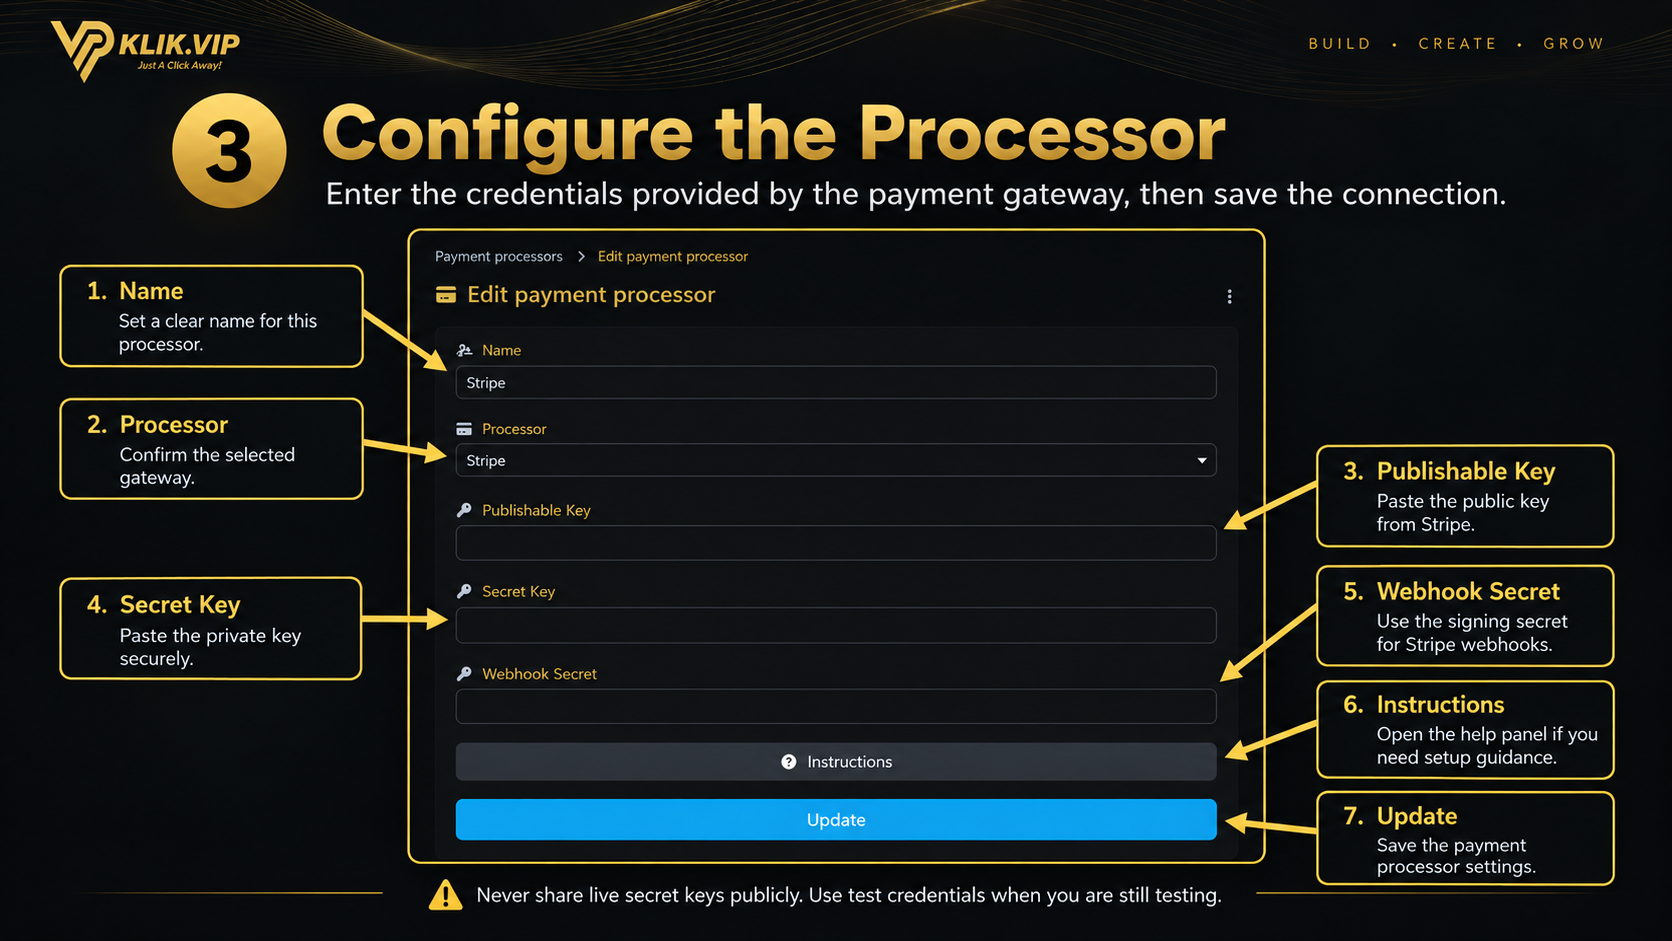
3. Configure the Processor
The required fields depend on the gateway you selected. The screenshot below shows the configuration fields displayed for Stripe.
- Name — the internal name for this processor connection.
- Processor — confirms the selected gateway.
- Publishable Key — enter the publishable key provided by Stripe.
- Secret Key — enter the private secret key from Stripe.
- Webhook Secret — enter the signing secret used for the Stripe webhook.
- Instructions — open the built-in instructions panel when you need setup guidance.
- Update — save the processor settings.
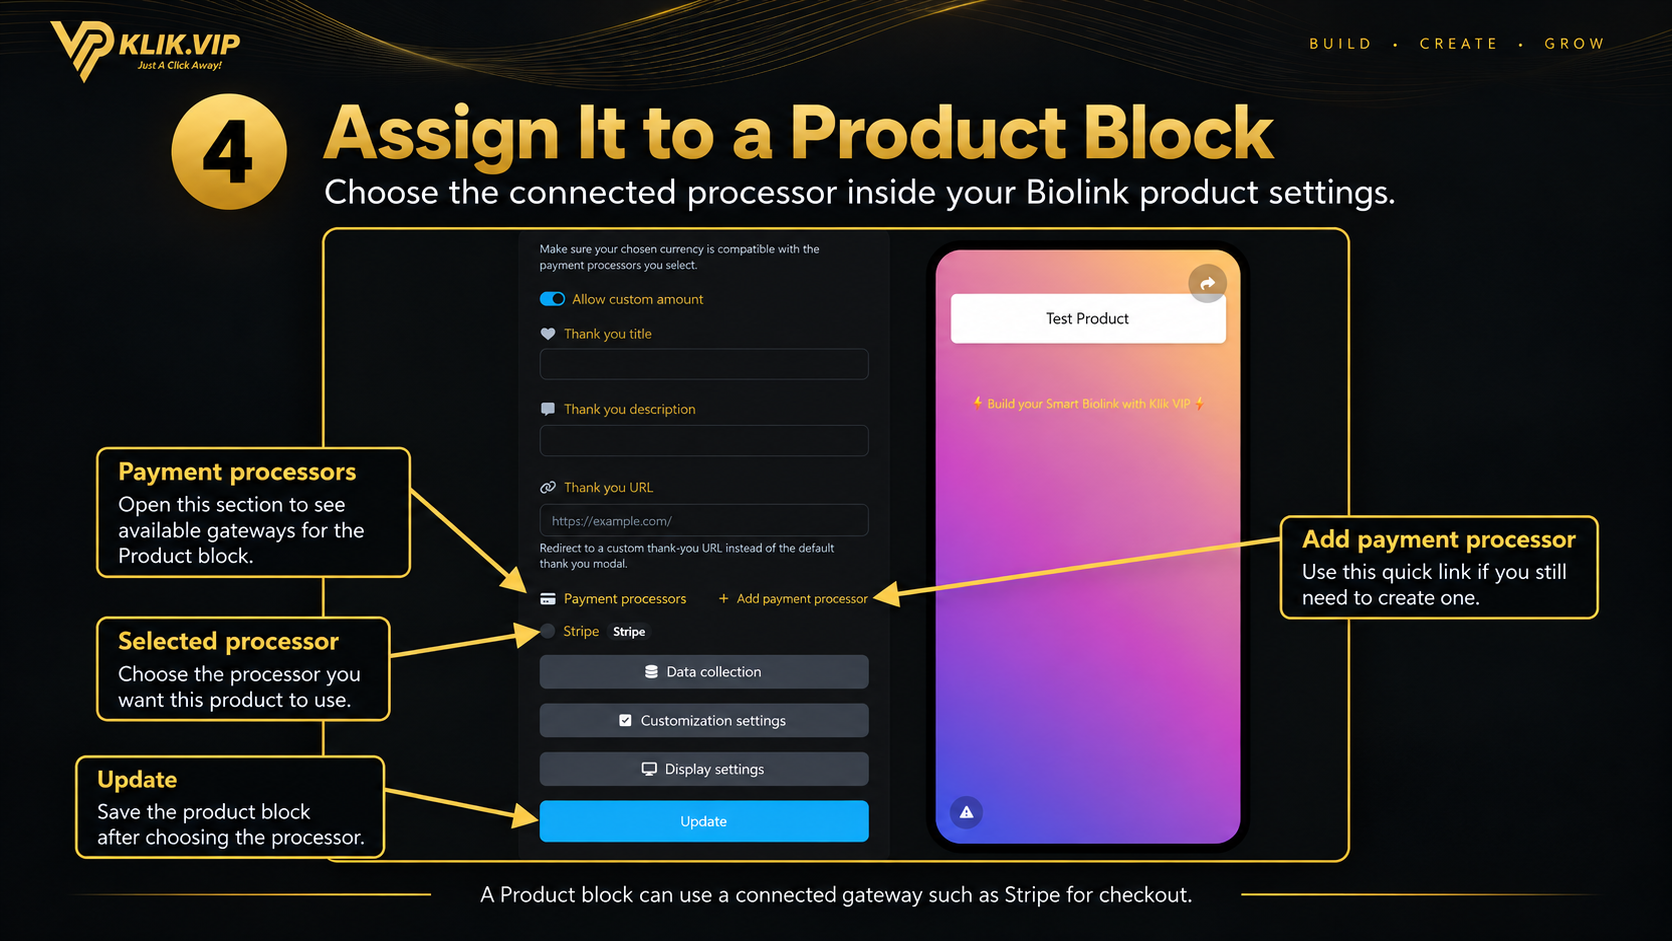
4. Assign the Processor to a Product Block
Once a payment processor has been connected, open the Product block in the Biolink where you want to accept payments.
- Open or create the Product block in your Biolink.
- Scroll to the Payment processors section.
- Select the connected processor you want the product to use.
- If no processor has been connected yet, use Add payment processor.
- Click Update to save the Product block.
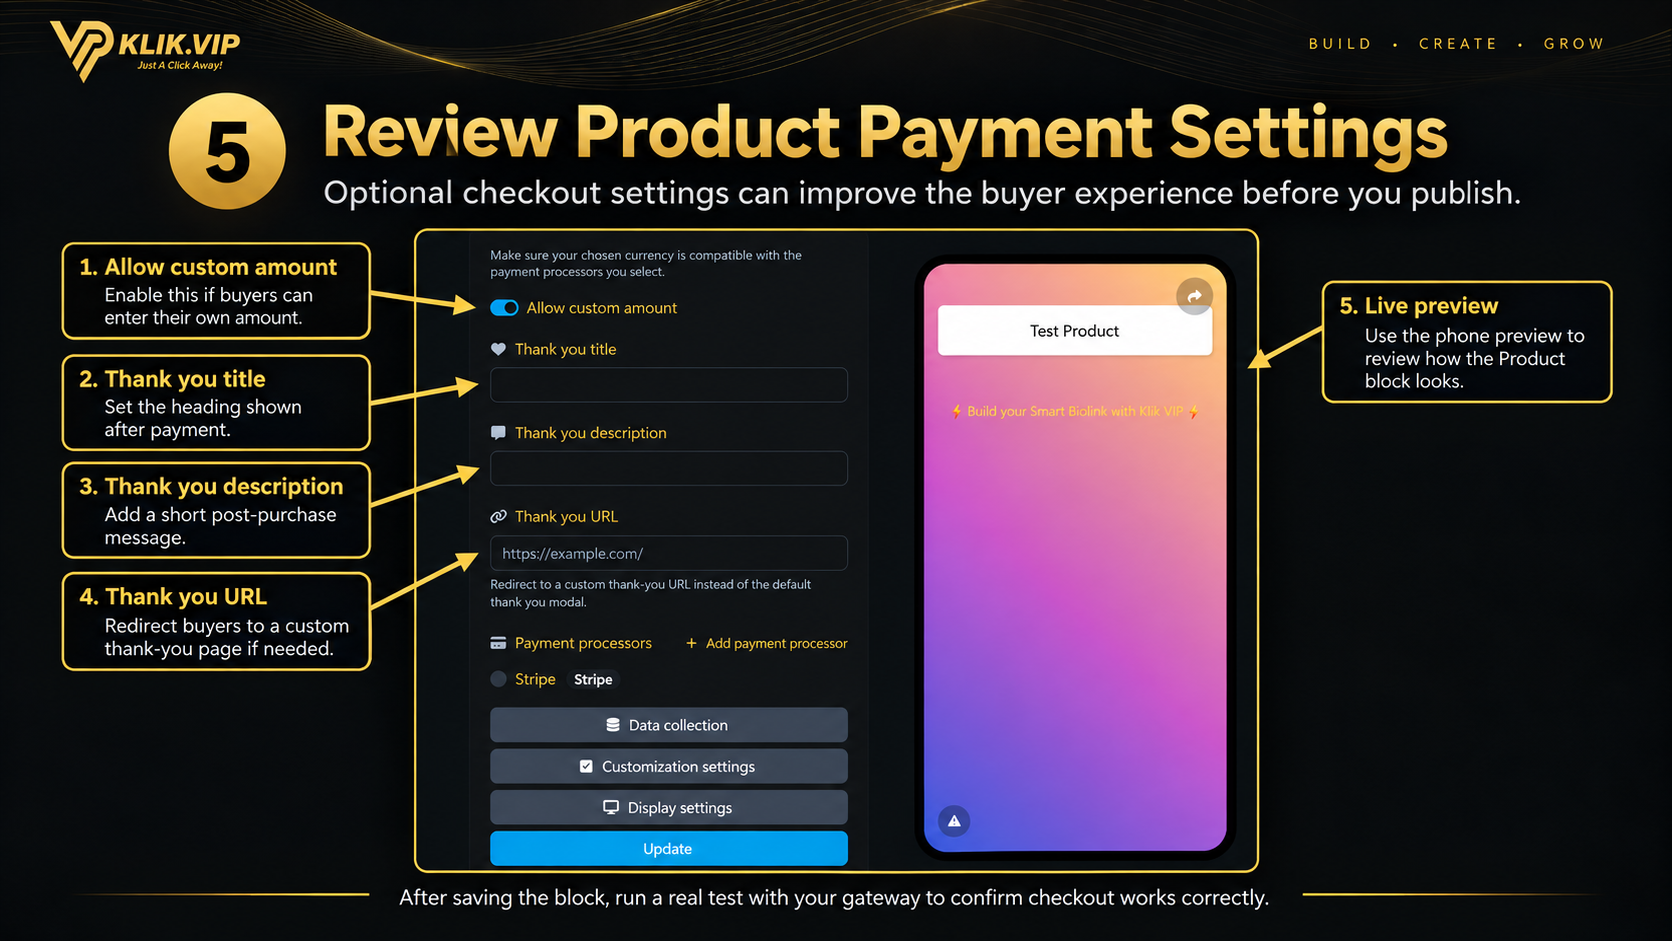
5. Review Product Payment Settings
Before publishing the Product block, review the payment-related settings shown in the editor.
Allow custom amount
Enable this when the Product block should allow buyers to enter their own amount.
Thank you title
Set the heading shown after the payment flow.
Thank you description
Add a short post-purchase message for the buyer.
Thank you URL
Use a custom URL when you want to redirect the buyer instead of using the default thank-you modal.
Use the phone preview beside the editor to review the Product block appearance before you save.
6. Security & Testing Tips
- Keep secret credentials private. Never expose a live Secret Key or Webhook Secret in public documentation.
- Use test credentials while testing when your payment gateway provides a test or sandbox mode.
- Check currency compatibility. The Product block reminds you to make sure your chosen currency is compatible with the selected payment processor.
- Run an end-to-end test before sending customers to the Product block.
- Verify the post-payment experience, including your thank-you message or Thank you URL.
- Use the built-in Instructions panel when you need processor-specific setup guidance.