What is a Splash Page?
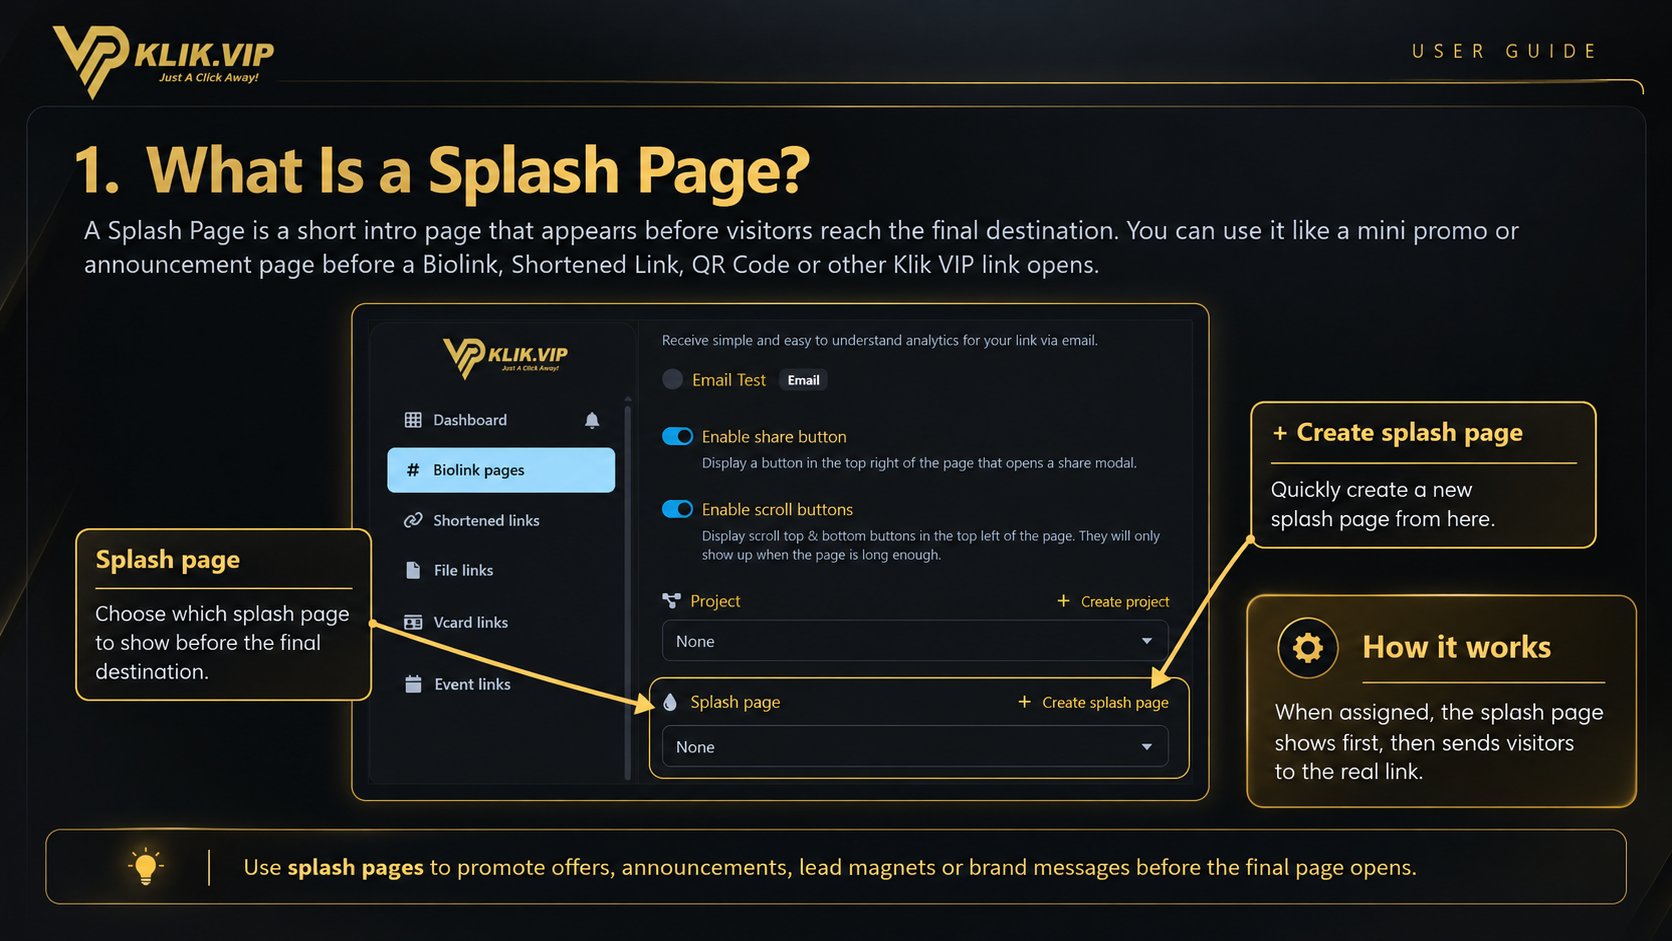
A Splash Page is an intermediate page shown before the visitor reaches the final destination. Think of it as a short advertising or announcement screen placed in front of your Klik VIP link.
For example, a visitor clicks your Biolink or Shortened Link. Instead of going directly to the destination, Klik VIP can first show the Splash Page for a few seconds. The visitor can then continue manually, or Klik VIP can automatically redirect them when the countdown ends.
Promotions
Show a limited-time offer, coupon, launch message or special campaign before the destination opens.
Announcements
Display an important notice, event update or brand message before visitors continue.
Lead magnets
Add a secondary button that sends visitors to another useful offer or resource.
Brand visibility
Add your logo, headline and description so visitors see your message before reaching the main link.
1. Create the Basic Splash Page
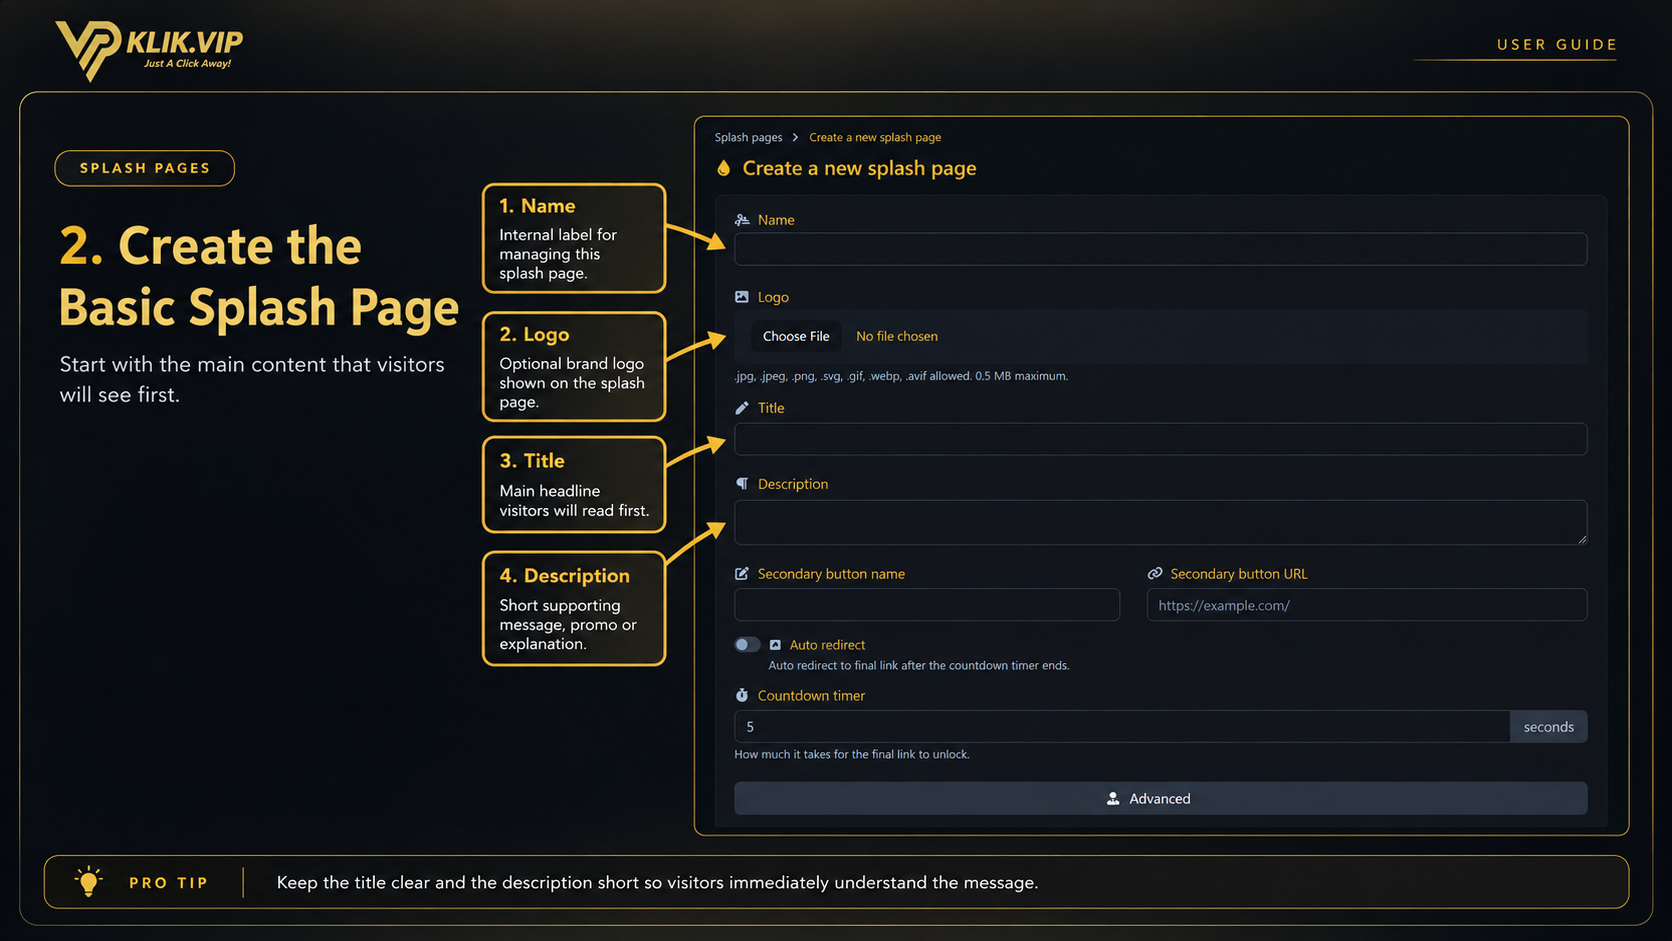
Open Splash Pages in Klik VIP and choose Create a new splash page. Start with the main content your visitors will see.
- Name — an internal label to help you identify the Splash Page later.
- Logo — optionally upload a logo or campaign image.
- Title — the main headline visitors will read first.
- Description — supporting copy, promo text or an explanation.
2. Configure Buttons and Redirect Settings
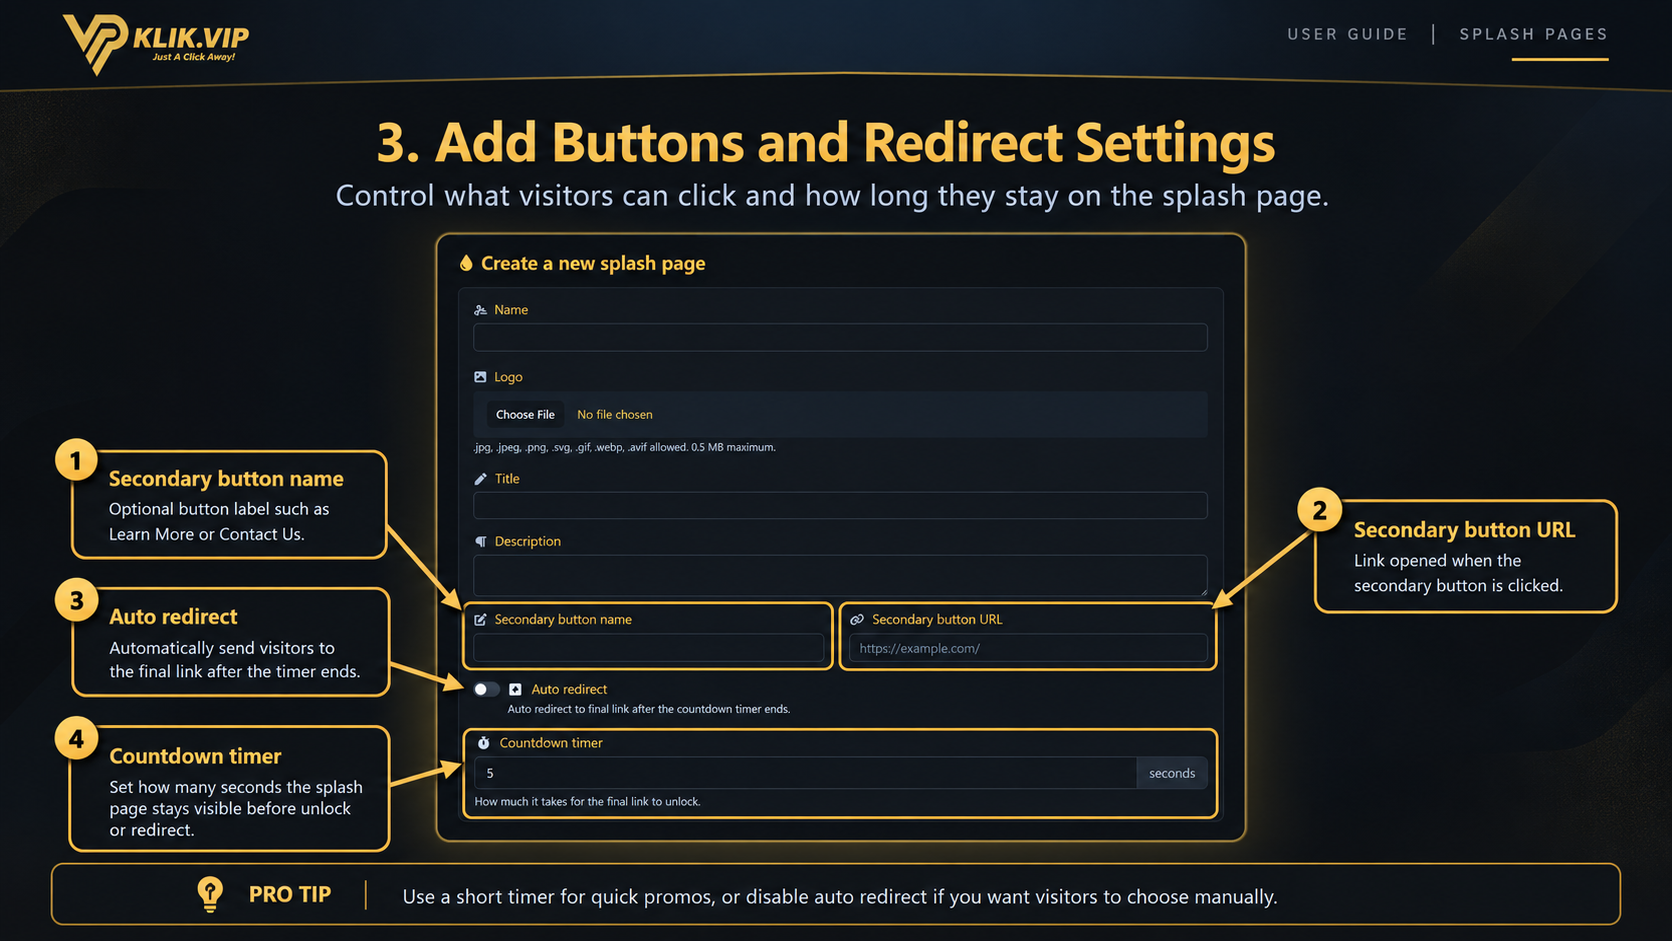
Next, decide what the visitor can click and how long the Splash Page should stay visible before the final destination becomes available.
- Secondary button name — optional button text such as Learn More, Claim Offer or Contact Us.
- Secondary button URL — the URL opened when the visitor clicks that secondary button.
- Auto redirect — automatically send visitors to the final destination when the countdown ends.
- Countdown timer — controls how many seconds the visitor sees the Splash Page before the final link unlocks or redirects.
3. Configure Advanced Options
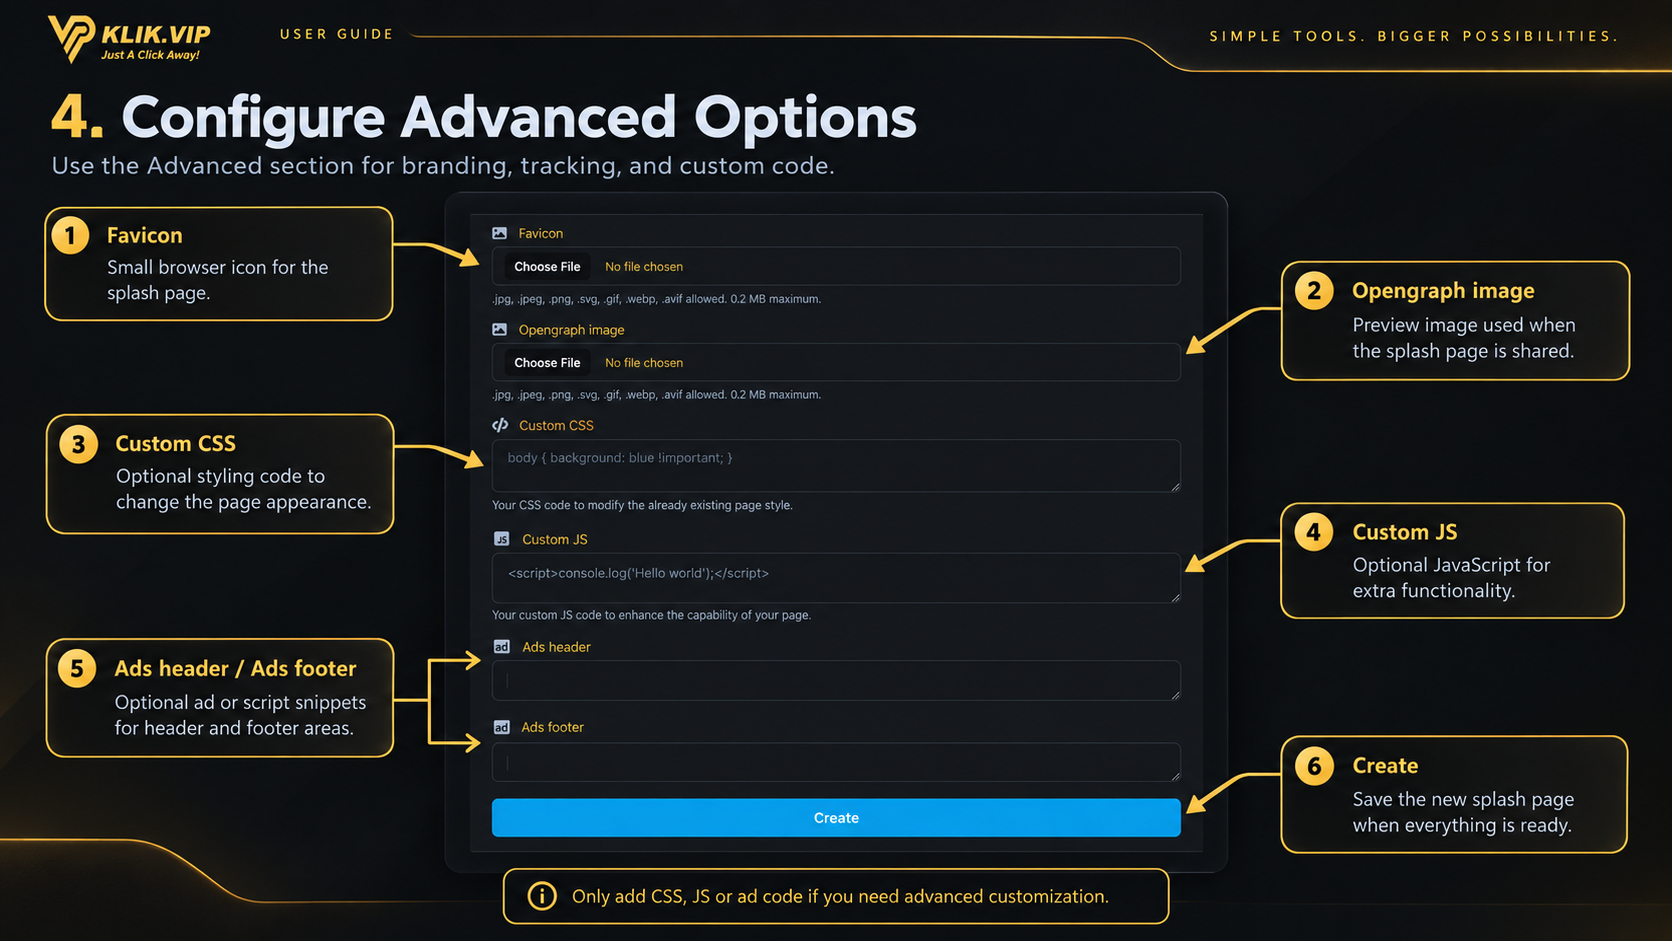
The Advanced section gives you additional control over branding, sharing and custom code. These fields are optional.
Favicon
Upload the small browser icon used by the Splash Page.
Opengraph image
Set the preview image shown when the Splash Page is shared on supported platforms.
Custom CSS
Add your own CSS if you need extra visual customization.
Custom JS
Add optional JavaScript when extra front-end behavior is required.
Ads header / footer
Add optional ad or script snippets to the available header and footer areas.
Create
When the Splash Page is ready, click Create to save it.
4. Assign the Splash Page to a Klik VIP Link
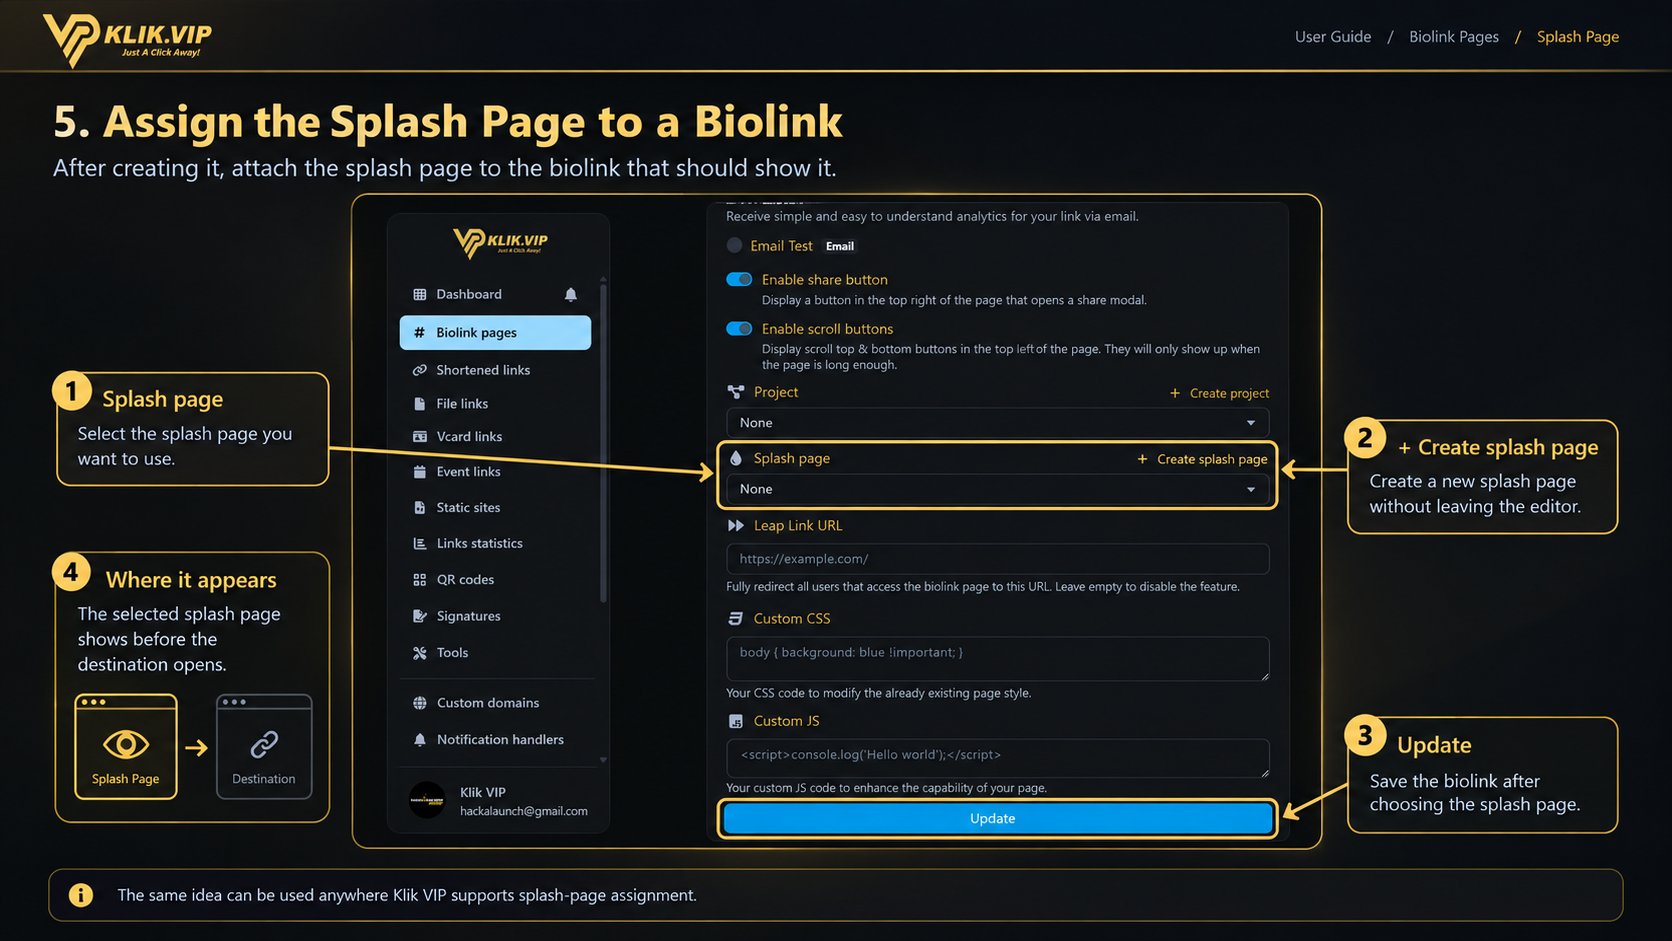
Creating the Splash Page does not automatically attach it to every link. Open the Klik VIP link you want to use, find the Splash page option, and select the Splash Page from the dropdown.
The screenshot below shows the option inside a Biolink. Klik VIP can also use Splash Pages with other supported link types, such as Shortened Links.
- Open the link you want to edit.
- Find the Splash page setting.
- Select the Splash Page you created.
- Click Update to save the link.
5. Tips & Use Cases
Good Splash Page ideas
- Flash sale: promote a time-sensitive offer before sending visitors to your sales page.
- Event announcement: show an important update before opening the event link or Biolink.
- Lead magnet: use the secondary button to promote a free guide, WhatsApp community or another campaign.
- Brand message: show a short introduction, sponsor message or campaign creative before the destination.
- Cross-promotion: promote another product or offer without changing the final destination URL.
Best practices
- Keep the title and description short so visitors understand the message immediately.
- Do not make the countdown unnecessarily long.
- Use a clear secondary button label if you add one.
- Test the complete visitor flow after assigning the Splash Page to a link.
- Use Advanced options only when you actually need the extra customization.